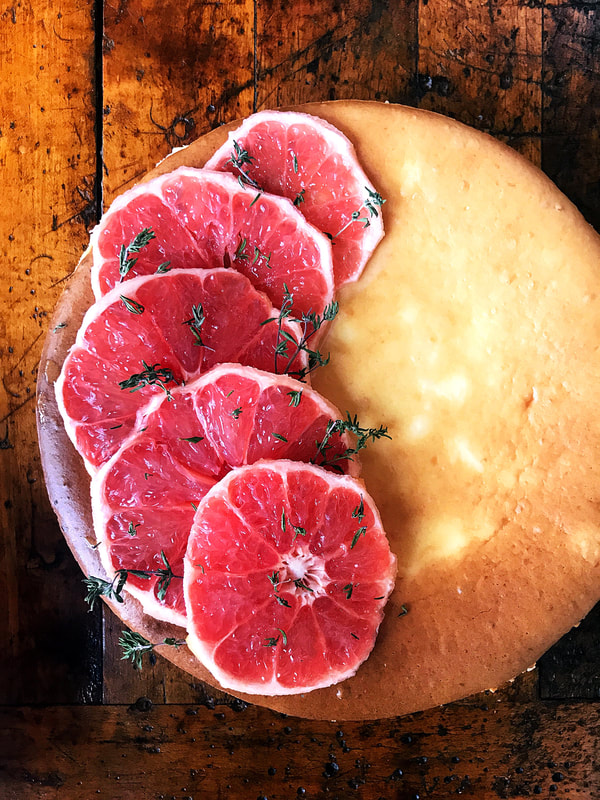
 If you can believe it, we have been doing our seasonal ingredient instagram collaborations for almost two years! It is such a wonderful way to get inspired in what can sometimes be the "work" of creating content, engaging in social media, and blogging. No matter how busy we get, these collaborations with Annie at @whatannieseating and all our instagram friends is something we look forward to. Winter is always tricky and now even trickier for us as we live in a true winter climate. No California produce at Wholefoods or the farmer market. We have to engage with what we have at our local market, as we watch snow fall and temperatures drop. Besides needing some Vitamin C, and a little acidic punch in our lives, we just happen to love Grapefruit. It is not your grandma's diet fruit, it is sweet, complex, acidic and lends itself to many preparations. We love picking an ingredient that can go many directions, savory, sweet, cocktails, you name it, grapefruit can do it. While I know many of you thought we would do a pie, as we have just launched a new pie business, Piedaho Bakery, we decided that grapefruit needed to be worked into a favorite dessert we haven't made in forever! Cheesecake! Initially i was concerned that the fruit would be too tart, but we used some Texas Pink Grapefruit and the combination with the sweet nilla wafers in the crust, and the creamy cheese was dynamite. If cheesecake can be called refreshing, this one would wear that label proudly. Be sure to check out the hashtag, #greatfruitgrapefruit and get inspired to cook and bake with grapefruit!!! Pink Grapefruit Cheesecake Makes 1 10 inch cake 2 1/2 cups crushed Nilla wafers 5 tablespoons melted butter 2 tablespoons sugar pinch of salt 38 oz cream cheese, room temperature 1 3/4 cup sugar 3 tablespoons flour 5 eggs 2 egg yolks zest and juice from 1 pink grapefruit (about 1/4 cup of juice and 1 tablespoon of zest) 1 tsp. Vanilla Extract a few slices of grapefruit for garnish Preheat oven to 325. Grease a 10 inch springform pan, then wrap the outside with foil. In a a bowl add the crushed cookies, melted butter and sugar and salt and stir. Then, press evenly into prepared pan. You want the crust to go up the sides about 1/2 inch or so. Bake for 8 minutes and then cool. In a stand mixer, beat the cream cheese until smooth and creamy, about 2-3 minutes. Add the sugar and flour gradually, beating well after each addition. Beat until smooth. Add the eggs one and a time, beating well after each, then add the juice, zest and Vanilla on low speed. You don't want to mix too much air into your batter. Pour into crust and place on baking sheet. Bake at 325 for about 70 minutes until cake is set and center is still jiggly. Your cake will keep cooking when you remove it. When you remove it from the oven, gently run a knife around the edge of the pan to help prevent cake from sinking. Cool for 2 hours then chill over night. When ready to serve, remove from springform pan and garnish with some slices of grapefruit.
6 Comments
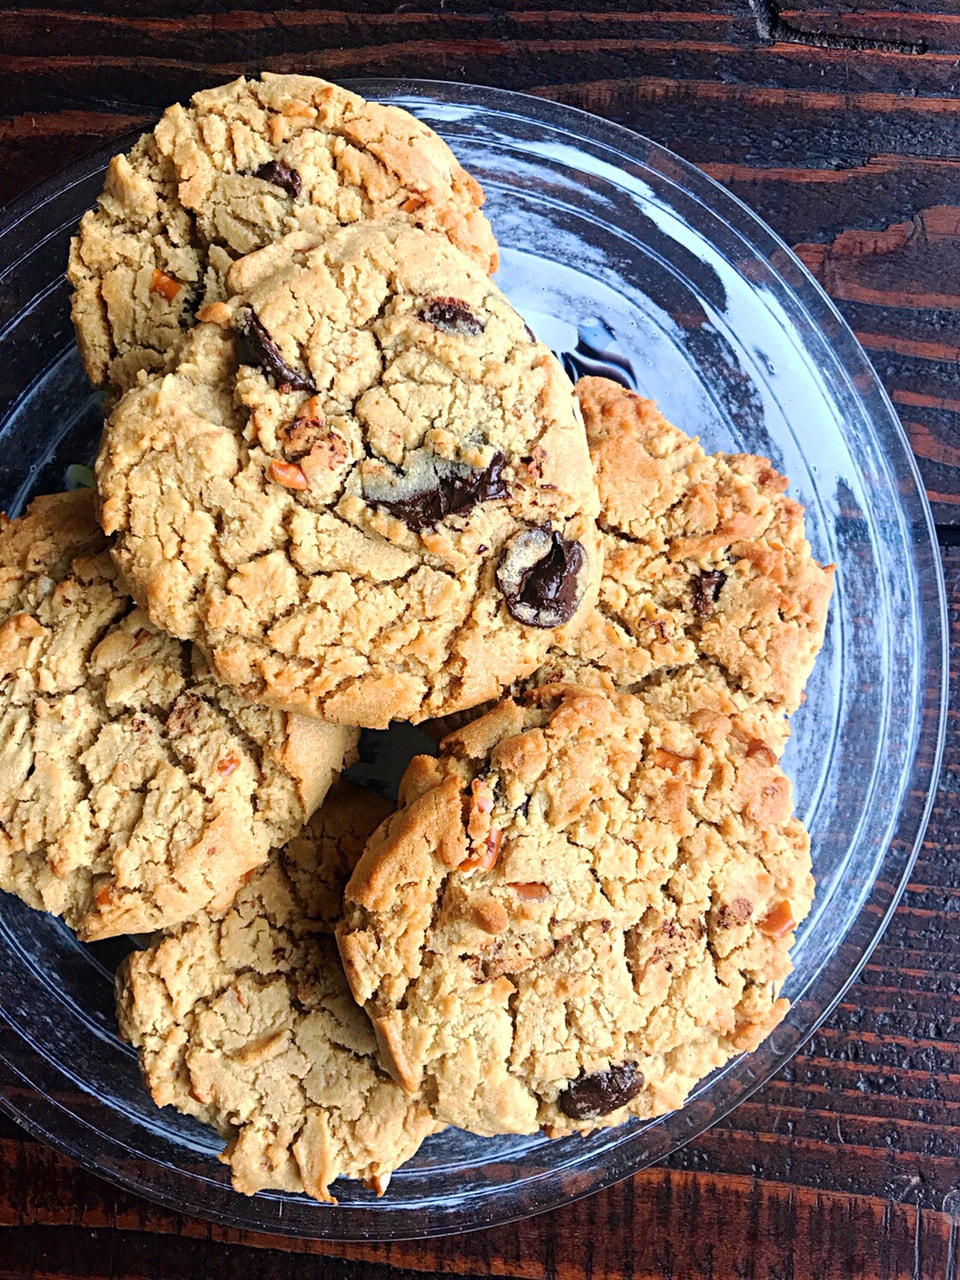 We are back! Or sort of.... It has been months since our last blog post as we have been busy launching our new business, PIEDAHO BAKERY! It has been quite a journey, but now you can order our pies and actually taste what we have been baking. Go check out out as we have just restocked some pies and have lots of new flavors like Pear Pie with Pistachio Frangipane and Sour Cherry Honey Almond Pie. We didn't want to totally give up here, so we still are baking and cooking away, the kids have to eat...LOL. This cookie we came up with over the holidays as we are suckers for anything with peanut butter and chocolate. Salty, sweet, heaven. I tend to eat this cookie and pretend it is like a protein bar, it has peanut butter, hence, its good for me! It is a great pick me up at three-thirty when the day is not done and all those evening activities like homework, reading, dinner, baths and bedtimes loom. By adding the pretzel, it doesn't feel too sweet, and they provide this nice little surprise crunch! Peanut Butter Chocolate Chunk Pretzel cookie 12 large cookies 1½ cup level flour ½ tsp. baking soda ¼ tsp. salt ½ cup butter, room temperature ¾ cup brown sugar ¼ cup sugar ¾ cup peanut butter 1 egg 1 tsp. vanilla extract 1 cup chocolate chunks, either chopped semi sweet or dark chocolate or morsels ½ cup crushed pretzels Preheat oven to 375 Add the butter and sugars to a mixer and cream until light and fluffy. In a separate bowl, combine flour, salt, and baking soda. Add peanut butter to the butter and sugar and mix for 1 minute until combined then add the egg and vanilla. Beat until incorporated. Add the dry ingredients and mix until just combined, and then fold in the chocolate and pretzels. Chill dough for about ½ hour. Scoop dough into about 1 ½ inch balls and place on baking sheet, flattening a bit with the back of a spatula. Bake for 11-12 minute until just beginning to brown. Cool.  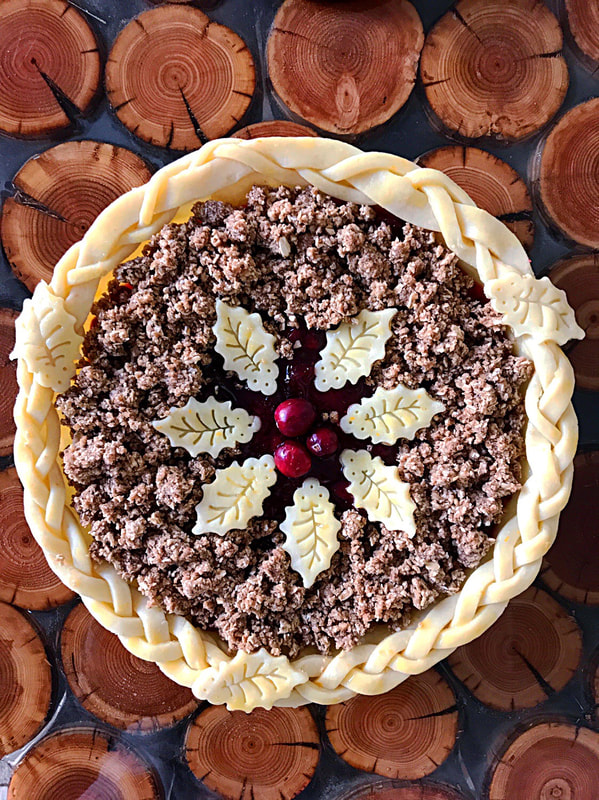 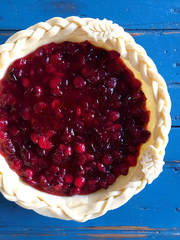 Hurray, it's fall! Pumpkin lattes, leaves, frigid temperatures! Well, sort of hurray, we are definitely not used to the cold weather, but we certainly love the foliage we are getting in Idaho, and that we are starting to slide into all our favorite holidays. But, before we get to turkey and stuffing and latkes and gingerbread houses and rows of cookies, we are exited to helm our 7th, yes 7th, ingredient based instragram collaboration with Annie of What Annie's Eating! This seasonal celebration of ingredients has been our favorite way to connect with all the like-minded creative foodies we have found on instagram. We are constantly blown away by everyone's passion for food and community, and in all honesty, this is the community that has offered us respite in these crazy times and we are so grateful. For this season, we have looked to the humble cranberry to offer up inspiration. For us, we really don't use it all that often except for our thanksgiving side dish, and dried for our granola or cookies over the rest of the year. However, cranberries are truly a special berry, packed with antioxidants and vitamin c. Their tart punch can lend themselves to both sweet and savory dishes, as their sweet and sour vibe can accompany meat or star in their own dessert as we have done here. Yes, they do need more than the usual amount of sugar to really bring out their charm, but, this pie is worth the extra! If you are someone who loves sour cherry pie, this is your winter pie. The streusel and oats give the pie an oatmeal cookie vibe, and the cranberries cook down with the orange and ginger to give you this delicious jammy filling. Be sure to check out our hashtag, #yesyoucranberry for everyone's amazing cranberry dishes and show us what you are making as well! Cranberry Orange Streusel Pie 9” inch pie 1 Disc of Your Favorite Pie dough (can make from scratch or use a store bought) Filling: 4 cups fresh cranberries 1 1/2 cup sugar zest of 1/2 orange juice of ½ orange pinch of salt 1 tablespoon of tapioca flour ½ tsp. ground ginger Oatmeal Streusel Topping: 4 tablespoons unsalted butter, softened 1 cup of oatmeal 1 tablespoon of flour 1 tsp. cinnamon ¼ cup brown sugar 1 pinch salt 1 egg, beaten. 1 tsp. sparkling sugar To make streusel, place all ingredients into the food processor. Pulse until crumbly and beginning to hold together, then set aside. Place all filling ingredients into a saucepan, cook for about 7-8 minutes until berries begin to burst, and the sugar and tapioca flour have dissolved. Set aside to cool. Preheat oven to 400. Roll our dough and line a 9-inch pie tin, trim edges and crimp. Add cooled filling and top with crumble letting a few berries peek through. You can use your extra dough to make some designs and place on top of crumble or along the edges. Brush with beaten egg and sprinkle with sparkling sugar. Bake pie for 10 minutes, then continue baking at 375 until evenly browned and berries are bubbling. Cover with tinfoil if the top gets too dark before the filling is bubbling. You really are just looking to insure your crust is baked as the filling has already been cooked. Cool before slicing and serve with sweetened whipped cream or ice cream! Check out these recipes from our friends! What Annie’s Eating Cranberry Mojitos Easy and Delish -- Avocado Cranberry Hummus Dip Flottelottehaan Buchteln with Cranberry Oranges Jam The Cooking of Joy’s Cranberry Curd Tart Jessie Sheehan Bakes - Cranberry Buckle Ciao Chow Bambina - Cranberry Pecan Cracker Spread Baking The Goods - Cranberry Apple Brown Butter Crumble Pie Katiebird Bakes - Cranberry Sauce Breakfast Rolls Crumb Top Baking’s Cranberry Orange Overnight Oatmeal Muffins 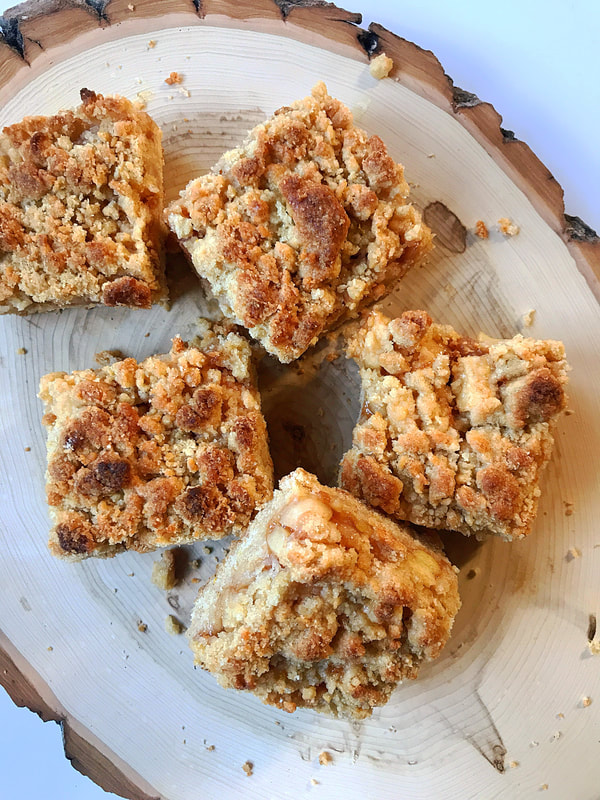 Mom's apple tree produced mountains of apples this year, so the ones that have not yet found themselves tucked into pie, have become a myriad of other delectables. These bars are a riff on our classic fruit bar, and play up all those things we love about apple pie. We have quite a few recipes here that showcase the versatility of our recipe, the Lemon Blueberry Crumb Bar, Rhubarb and Mulberry Crumb Bar, Cranberry Orange, mixed fruit, Apricot, you get the idea. We love this recipe as it feels like dessert, but also feels like a decent snack for the kids. Win win!
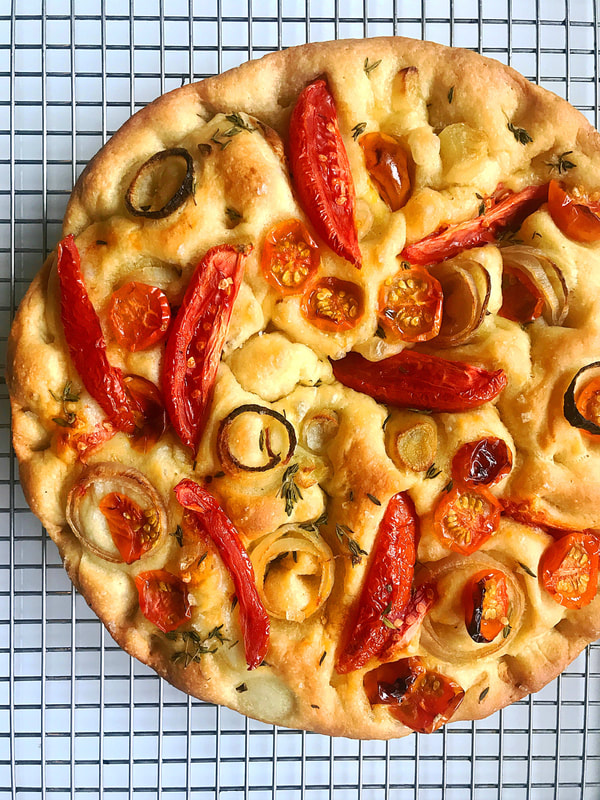
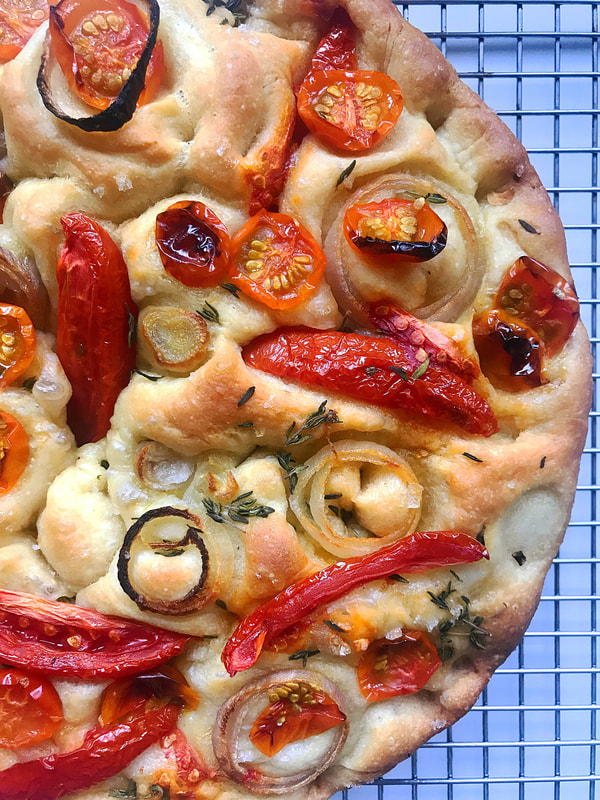
Apple Pie Crumb Bar 1 9x13 pan, about 16 bars 1-cup brown sugar 3 cups flour 1 tsp. baking powder 1 tsp. cinnamon, divided ½ tsp. salt 1-cup cold butter cut in cubes Zest of 1 lemon 2 eggs 3 cups diced, peeled apples ½ cup sugar 2 tsp. tapioca flour Juice of 1 lemon 1 tsp. Vanilla Extract Preheat oven to 375 Grease a 9 x 13” inch Pyrex baking dish. In a medium bowl mix flour, brown sugar, baking powder, ½ tsp. cinnamon, salt, and lemon zest. Then, add in the cold butter and egg, cutting it in with a pastry cutter or fork. You can also use your fingers to break up any large pieces of butter. Once the mixture resembles crumbs, press half into the pan. In another bowl, add sugar, lemon juice, ½ tsp. cinnamon, tapioca powder and Vanilla extract and mix. Carefully stir in apples. Spread fruit with juices evenly on top of dough and sprinkle with remaining dough. You want some fruit peeking out. Bake 40-45 minutes until fruit is bubbling and topping is golden brown. Cool before slicing. 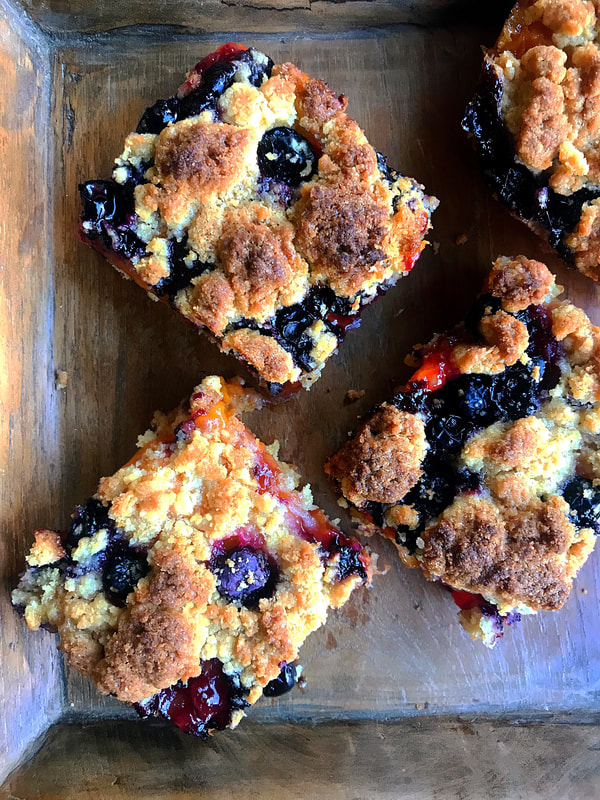 It has been quite an adventure moving to Idaho. Moving out of Los Angeles was bittersweet, we miss our friends and family, but we have fallen even more in love with this special place we call home now. Surrounded by blue skies, mountains, and nature has filled each of us with a bit more zen, and we are exploring new places every day. On Facebook, we found a lovely lady who was selling fruit from her garden, so we drove over and picked up a few pounds of the most glorious little apricots. Her garden was overflowing with bounty, we have our eye on her last cutting of rhubarb in a few weeks and the plums were just starting to come in. Some of the apricots got tucked into a pie, some into a galette, and then these we paired with some blueberries for a bar to die for. We are huge apricot fans, apricot jam is literally our jam, and we love a good crumb bar. These came out just sweet enough from the blueberries, and tart from those tasty apricots. If you can't find any apricots as the season here is almost over, sub in plums, or nectarines! Apricot Blueberry Crumb Bars Makes one 9” x 13” Pyrex 1-cup brown sugar 3 cups flour 1 tsp. baking powder ½ tsp. salt 1-cup cold butter, cut into pieces Zest of a lemon 2 eggs 1-cup blueberries 3-4 cups sliced apricots 1-cup sugar 4 tsp. cornstarch or tapioca flour Juice of 1 lemon 1 ½ tsp. almond extract Preheat oven to 375 Grease a 9 x 13” Pyrex baking dish. In a medium bowl mix flour, brown sugar, baking powder, salt, and lemon zest. Then, add in the cold butter and eggs, cutting it in with a pastry cutter or fork. You can also use your fingers to break up any larger pieces of butter. Once the mixture resembles crumbs, press half into the pan, making sure you have an even base. In another bowl, add sugar, lemon juice, cornstarch and almond extract and mix. Carefully stir in fruit. Let the fruit sit for a few minutes. Spread fruit with juices evenly on top of dough and sprinkle with remaining dough. You want some fruit peeking out. Bake 40-45 minutes until fruit is bubbling and topping is golden brown. Cool before slicing. 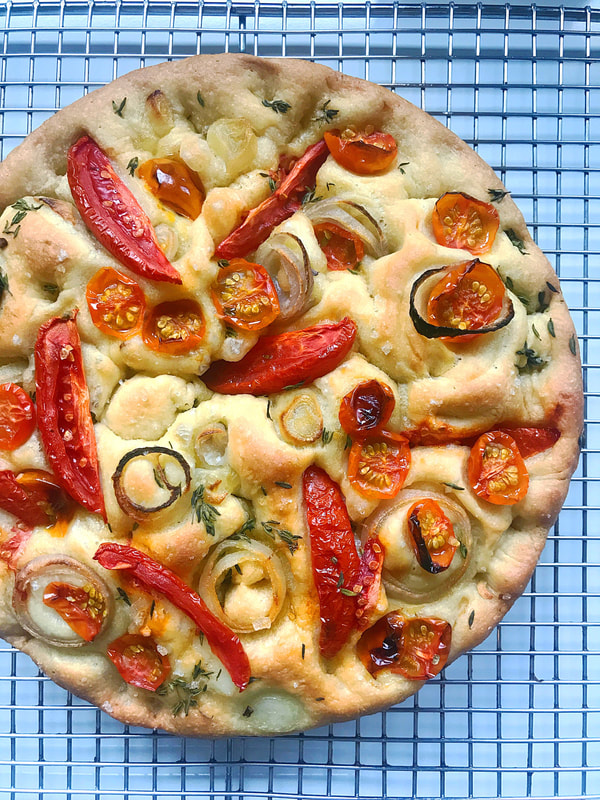 We can't believe this is our 6th ingredient based Instagram collaboration! What began as a instagram friendship born from a love of the Santa Monica Farmers Market with Annie of Whatannieseating, has grown into a diverse and creativity instagram community that inspires us daily. The reason we started this blog and really love cooking and baking in general is the ability food has to connect people. In a world ever more intense, crazy and alienating, food can bring disparate groups of people together, around a table, to share space and conversation. You can sit down with anyone over a good meal and leave feeling more connected and more satisfied. While some may think this is simplistic, food is about nurturing, nurturing health, understanding, community. This was one of Anthony Bourdain's most admired threads. He understood that if you ate someone's food, sat at their table, listened to them, you had this direct line to understanding more about a culture, a family, a person then you could any other way. These collaborations with chefs all over the world is a testament to this common thread of humanity. As it is summer, how could we keep ignoring the work horse of most kitchens, the tomato! Acidic, sweet, bright, tomatoes are a versatile and abundant summer ingredient. We had trouble narrowing down what we wanted to share as there are so many options, but this focaccia really stood out. Some of you may know, we have been trying to conquer our fear of yeasted breads, and constantly challenge ourselves to bake homemade breads. By adding the tomatoes, and shallots and herbs to our basic focaccia recipe, a delicious snack bread was born. We ate this along some roasted salmon for dinner, and made it into luscious sandwiches the next day. You could also serve with with some fresh ricotta or pesto as an afternoon snack. And, we think nothing says I love and appreciate you, more than homemade bread! Be sure to check out our hashtag, #wesaytomatoes for everyone's summer tomato dish and below is a list with links to some amazing blogs and recipes! Get thee to a farmers market, grab some tomatoes and get cooking!!! Heirloom Tomato, Shallot and Thyme Focaccia Makes 2 8 inch rounds or 1 sheet pan with lip 2 1/4 teaspoons active dry yeast 1 3/4 cups warm water, should feel hot to touch 4 cups flour 2 teaspoons salt 4 1/2 tablespoons extra virgin olive oil, divided 2 tsp. fresh thyme, pulled from stems 1 cup of assorted heirloom tomatoes, sliced in half if using cherry tomatoes, or sliced in quarters or eights depending on size of tomato. 1 large shallot, sliced and separated into rings About 1 tsp. flaky sea salt In your stand mixer, dissolve the yeast in the warm water. Let sit for five minutes until yeast starts to foam. Add the flour, salt, and two tablespoons of olive oil to the yeast. Using the dough hook, on medium fast speed, knead the dough for about 5-7 minutes until smooth dough forms. Coat a large bowl with a little more olive oil and put dough inside. Cover with a warm, damp towel, and leave to rise in a warm place for about 2 hours. Dough should double in size. Drizzle 1 tsp. olive oil in each round pan, or 2 tsp. into the sheet pan with lip and rub all over. If using two pans, split dough in half and push dough with fingertips to edges of pan, stretching gently. It may not reach all the way to the sides. If using one sheet pan, push into rectangle as best you can. Cover again with a cloth and let rest for 30 minutes. While the dough is resting, preheat the oven to 450°F with a racks spaced evenly in oven. Once the dough has rested and it has puffed up again, sprinkle dough with thyme, tomatoes and shallots. Gently using your fingertips, poke the dough, creating shallow dimples and trying to avoid smashing tomatoes. With remaining olive oil, drizzle over dough and let it pool in some of the indentations you just made. You may need a bit more oil. Sprinkle with sea salt. Place dough in the oven and immediately turn the heat down to 375°F. Bake about 20 - 25 minutes, checking after 15 minutes and switching dough placement. The focaccia is ready when it's golden-brown and edges feel firm. Remove bread from oven and carefully remove from pans. Use a wire rack to cool the bread. Eat warm or if eating later, you can reheat at 350 for a few minutes. What Annie's Eating Pizza with Sungold Tomatoes, Burrata and Calabrian Chiles Well-Fed Soul's Heirloom Tomato Galette with Basil Honey Ricotta The Wood and Spoon's Roasted Summer Vegetable Quiche Fufu's Kitchen Tomato Beef Skillet Flour's in Your Hair Tomato and Roasted Garlic Mini Galettes A Forkful of Yum's Fried Green Tomato Caprese Salad The Cooking of Joy's Tomato and Eggs Over Rice The Moody Loon's Tomato Juice Spheres Always Eat Dessert's Heirloom Tomato Salad with Burrata and Grilled Bread The Herb and Spoon's Za-atar Heirloom Tomato Tart Retrolillies' Heirloom Tomatoes with Chili Oil, Pesto and Mozzarella More Icing than Cake's Roasted Tomato and Malt Vinegar Slaw Worthy Pause's Paleo Tomato-Basil Cauliflower Rice Short Girl Tall Order's Roasted Heirloom Tomato and Vegan Pumpkin Seed Pesto Toasts What Should I Make For's Tomato Shortcake with Whipped Ricotta Smart in the Kitchen's Indian Spiced Marinated Tomatoes Hola Jalapeno's Warm Salt Bagels with Rajas Cream Cheese And Tomatoes Le Petite Eats Vegan Tomato Tart Six Snippet's Heirloom Tomato and Salted Egg Salad Rezel Kealoha's Late Summer Tomato Pesto Pasta Salad Marianne'es Kitchen Eggplant Bruschetta Well Seasoned Studio's Sunday Supper Sugo Slow Roasted Pork Shoulder Salt n' Pepper Here's Poached Shrimp and Tomato Salad A Modest Feast's Turkish Eggs with Garlic Yogurt and Tomatoes Baking the Goods' Heirloom Tomato Pimento Cheese Tart Crumb Top Baking's Tomato Arugala and Mozarella Quiche Katie Bird Bakes Heirloom Tomato Tart Lemon Thyme and Ginger's Tomato Mozarella Salad Baby Girl Yum's Beef and Tomatoes with Egg on Rice Sugar Salted Summer Tomato Salad with Balsamic Red Onion Easy and Delish's Tomato Basil Caipirinha Simple and Sweet Food's Pan Con Tomate Knead Bake Cook's Roasted Tomato Sauce with Mini Meatballs It's a Veg World Afterall's Roasted Cherry Tomato Sauce with Fresh Herbs 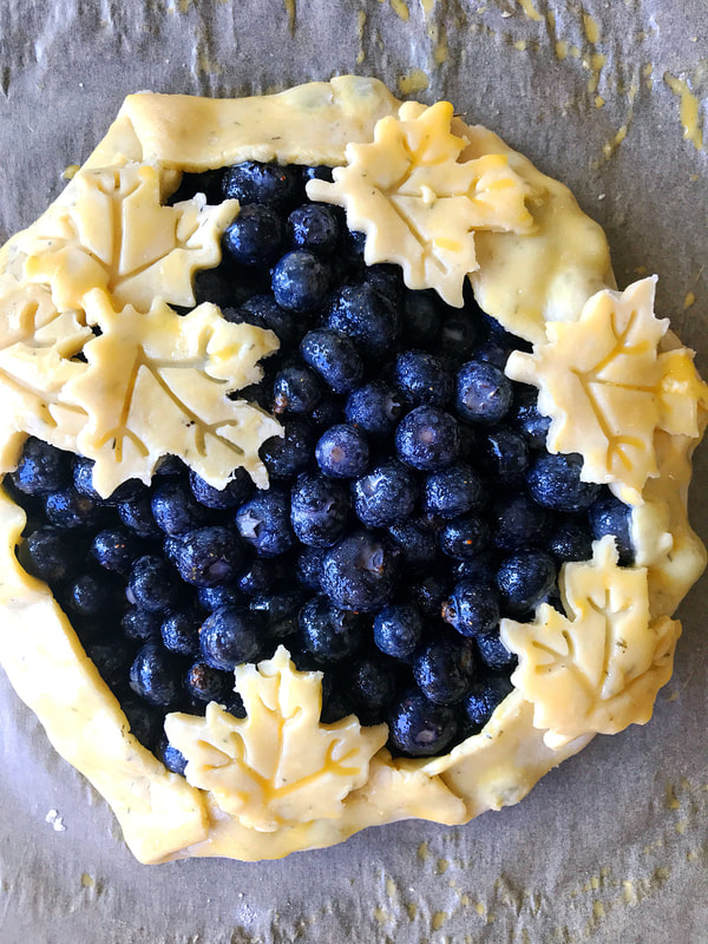 The galette is our go-to gal. She is relatively easy to put together, and is always a crowd pleaser. Once you get in the habit of making dough, if you double up each time you make it, you can have discs waiting for you in the freezer. This makes it very simple to see what fruit you have on hand, pull a dough out the night before and place in the fridge (or pull out just a few hours and let rest at room temperature) and whip up a treat. While we often use a mixture of whatever fruit seems like it is just past its prime, sometimes we want the the singular pop of blueberry. Combining this super fruit with lemon and ginger gives you a dessert worthy of any potluck. The flavors of the spice and lemon enhance the sweet tart tang of the berry and if you dollop on a big scoop of ice cream, you have a little bit of heaven.
Lemon Blueberry and Ginger Galette Makes one Galette that serves about 6-8 ½ Batch Any Basic Pie Dough, or store bought. Enough for 1 disc of dough. 2-3 cups blueberries 1/2 lemon, juiced and zested ½ c sugar 3 tablespoons tapioca flour, cornstarch or flour ½ teaspoon ginger ½ teaspoon vanilla extract 1 egg, beaten Sugar for sprinkling Preheat oven to 375 Add tapioca flour, lemon juice, vanilla extract, lemon zest, sugar, and ginger to a bowl. Mix then add the berries. Carefully mix fruit, but mix well so juices begin being released. Mix until tapioca flour is almost dissolved then set aside. Roll out your dough on a well-floured surface. Trim sides to get as close to a circle as you can then save the scraps. Move dough onto a parchment lined baking tray preferably without a lip. Place fruit in middle of the dough and spread out, leaving about a two-inch rim around the sides. Brush with egg wash and start at twelve o’clock, folding the dough in. Work your way around the tart and use the egg wash to seal your folds. You will get about 6-8 folds resembling an octagon or hexagon. You can stop here and brush with egg wash, then sprinkle with sugar. Or, reroll scraps and have some fun with cookie cutters, using the egg wash to help stick your shapes to the tart. When done decorating, brush with egg wash and sprinkle with sugar. Bake for 40-50 minutes until fruit is bubbling and dough is brown. If it browns too quickly cover with foil and keep baking. *You can also freeze before baking and then bake when you choose. It will take about 20 more minutes. 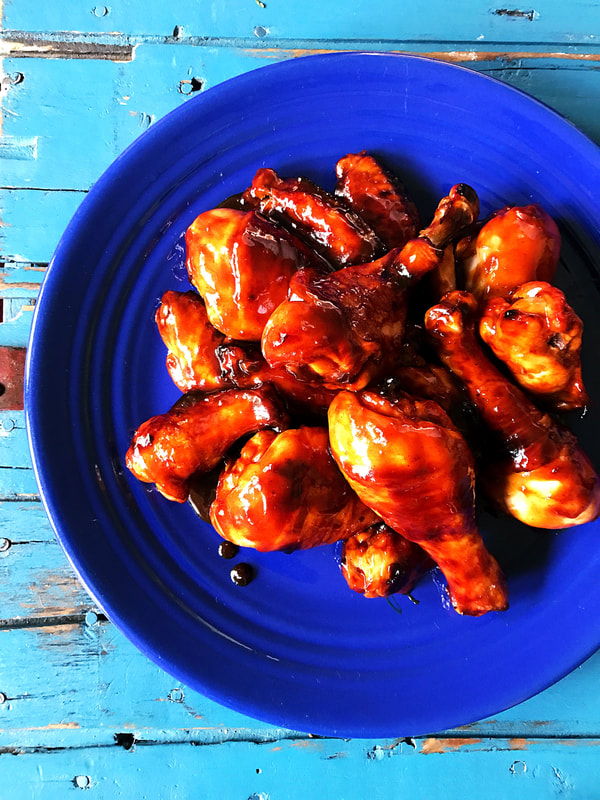 The kids have become obsessed with wings. Sticky, sweet and spicy. All of them are wanting to try things spicier, riskier, and more adult which makes sense as they all get older... However, we are not big fans of frying. While the occasional fried chicken fest is a must, weeknight dinners can not include that kind of clean up. We tinkered with some recipes and found our way to this one. This recipe has worked its way into heavy rotation in our house. We love it, the kids love it, and it is super simple to put together. We have experimented with all sorts of sauces, so feel free to wing it once you get the basic preparation down. While we don't preach health and wellness on this blog, we do love to try and make some of our favorites, a little healthier, and by baking the wings and drumsticks, we accomplish that goal. And, the clean up is way easier. Yes, there is a place and time for that wonderful spicy, fried, buffalo wing, and that time is at some awesome sports bar, watching a basketball game. For the rest of the times we want wings, this dish will do! Baked Asian-Style Chicken Wings serves about 6 15-18 pieces of mixed chicken pieces, wings and drumsticks 3/4 cup rice vinegar 1/2 cup soy sauce 2 tablespoons sesame oil 1 tablespoon fish sauce 1 9oz jar of hoisin sauce (you can use plum sauce or sweet chili sauce as well) 2 tablespoons of miring 1 garlic clove, zested or minced very fine 1 inch piece of ginger, zested or minced very fine 1/2 teaspoon chili paste (add more if you like them spicier) Preheat oven to 425 In a bowl add all ingredients but chicken and stir. Adjust for sweetness and heat. Place chicken in a bowl and pour half the sauce over the chicken, stirring to insure all chicken gets coated. Reserve the other half. Let rest in fridge for about an hour, tossing occasionally. Arrange a baking wire rack on top of a baking sheet and place the chicken in rows. You will need two trays. If you don't have a wire rack, place chicken directly on parchment lined baking tray. Baste with sauce and bake for 20 minutes. After 20 minutes, pull chicken from oven, flip over the pieces with tongs, baste again with sauce from marinade and bake for another 20 minutes, or until juices run clear. Be sure to switch the 2 trays position as well. After this baste, throw away the marinade. While chicken is baking, take your reserved sauce and reduce by about half in a small saucepan over medium heat. You want the sauce to thicken. When chicken in done, take chicken and toss them in a bowl with your thicken sauce and serve! You can garnish with diced scallions or sesame seeds. 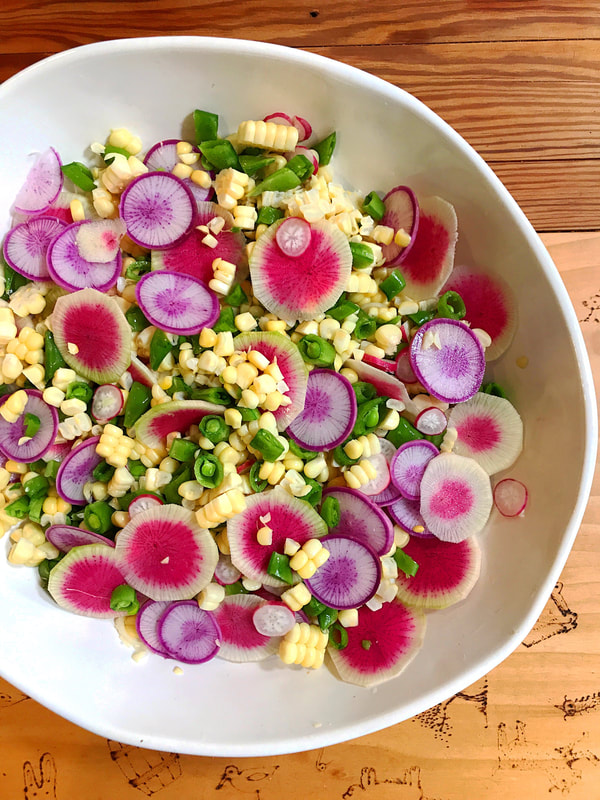 Summer is upon us and that mean we get to go crazy with salads! Veggies and fruits are at their peak of perfection, and bursting with fresh flavor, so let them shine. When we make salads we are always thinking about how to combine crunchy, spicy, sweet, raw, cooked, tang...layers of flavors. This salad gets sweetness from the peas and corn, crunch from the peas, and spice from the radish. The dressing gives it that earthy, acidic punch and if you are keeping the seeds on from the jalapeño, you get another layer of spice. You can dress this salad ahead of time and let it sit, and it does well overnight, so if you have extras don't fret, just re-serve!!!
*One other tip for summer, buy yourself a mandolin. Yes, they can be dangerous and mom is not allowed to use one anymore, but, if you can carefully master one, you can create a new salad just by slicing the veggies thin or in a new direction. Corn, Snap Pea and Radish Salad with Cilantro Lime Vinaigrette Serves 6 1 Cup cilantro, stems included 2 scallions 1/3 of a jalapeno, deseeded (if you like heat leave in seeds) 2 limes, juiced and zested ¼ cup water ¼ tsp. salt 1-cup olive oil 3 stalks of corn, boiled, cooled and kernels cut from stalk 3 large radishes, like watermelon radish, French radish or purple ninja, thinly sliced 1 cup of snap peas, diced In a blender, add water, cilantro, scallions, jalapeno, the limejuice and zest, salt and olive oil and blend until smooth. Set aside. In a bowl add the corn and snap peas and mix together. Add radishes and mix. Just before serving top with dressing and toss. 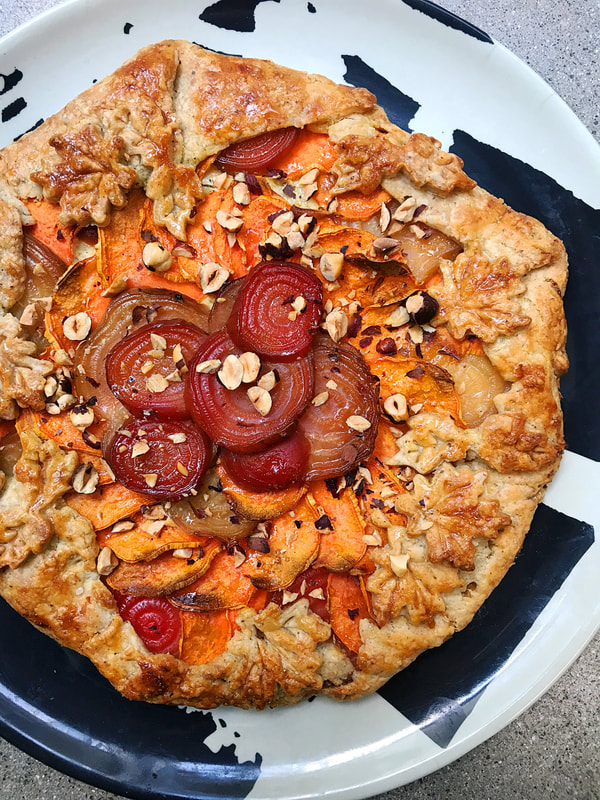 Sometimes the best ideas and recipes come from tinkering with ingredients you have in the fridge or pantry. Sort of like playing your own version of Chopped, you are forced to reimagine and create. This ridiculously good galette was the product of just that mind set. We had roasted some beets earlier in the week and forgotten to eat them, had a sad bag of a few hazelnuts sitting around, and a sweet potato that never made its way into roasted sweet potato fries. We had been wanting to experiment with adding nuts to our pie dough, so figured why not try the hazelnuts, as they always pair well with the earthy sweetness of beets. We randomly had some Boursin and cream cheese, so bam, this galette was born! Having made a galette a few weeks ago with raw beets, the roasted ones proved to be a better idea, and by slicing the sweet potatoes super thin on a mandolin, they also had time to bake and get all creamy. Hitting the sweet, the savory, garlicky, creamy, and crunchy notes, our guests inhaled this tart, coming back for seconds and thirds! Beet, Sweet Potato and Hazelnut Galette Makes one Galette that serves about 6 ½ Batch Hazelnut Pie Dough 2-3 beets, roasted and thinly sliced 1/2 large sweet potato, thinly sliced on mandolin 1 package garlic and herb Boursin cheese ½ c cream cheese 1 tablespoon of olive oil ¼ cup hazelnuts, roasted and roughly chopped 1-tablespoon honey 1 egg, whisked Dough (Makes 2 9 inch shells) 1 cup chilled butter 4 tablespoons vegetable shortening 2 cups all-purpose flour ½ cup hazelnuts 1-teaspoon salt 1-tablespoon sugar 7 tablespoons ice water 2 teaspoons apple cider vinegar Dough- Put nuts into the food processor. Pulse until nuts are ground. Add butter, shortening, flour, sugar and salt into food processor. Pulse until you have small pea sized pieces. Add apple cider vinegar and chilled water to the flour mixture and pulse until dough just comes together. Flip dough onto floured surface and push into a ball. Divide into two, and gently flatten each half into a disc. Wrap in plastic and let rest in fridge or freezer until ready to use. If freezing the dough, put in fridge the night before you want to make the tart. *You can also make the dough by hand. Add ALL the dry ingredients to a bowl. Cut butter into smaller pieces and add the butter and shortening to the flour. Cut with a pastry cutter or two forks until you have pea-sized pieces and mixture looks sandy. Add all your liquids and stir until dough just comes together, then turn out onto plastic and push into ball. Divide in two and follow above. *To roast beets, wrap in tin foil, creating a little packet, and roast at 400 degrees until easily pierced with a knife. Preheat oven to 375 Mix the cheeses together and set aside. Roll out one disc of dough on a well-floured surface. Trim sides to get as close to a circle as you can then save the scraps. Move dough onto a parchment lined baking tray preferably without a lip. Place cheese in center and spread out, leaving about an-inch rim around the sides. Alternating rings of beets and sweet potatoes, starting at the edge, leaving an inch, circle your vegetables, layering them slightly on top of each other until you have used them all. Drizzle with olive oil. Brush with egg wash and start at twelve o’clock, folding the dough in. Work your way around the tart and use the egg wash to seal your folds. You will get about 6-8 folds resembling an octagon or hexagon. You can stop here and brush with egg wash. Or, reroll scraps and have some fun with cookie cutters, using the egg wash to help stick your shapes to the tart. When done decorating, brush with egg wash. Bake for 40-50 minutes until veggies are slightly browning and dough is brown. If it browns too quickly cover with foil and keep baking. Remove from oven and drizzle with honey and sprinkle the hazelnuts. Serve! *You can also freeze before baking and then bake when you choose. It will take about 20 more minutes. 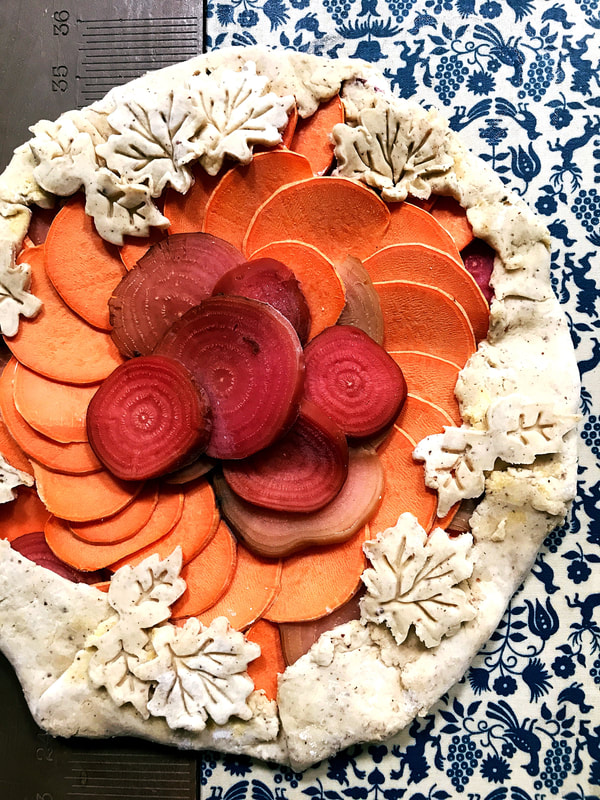 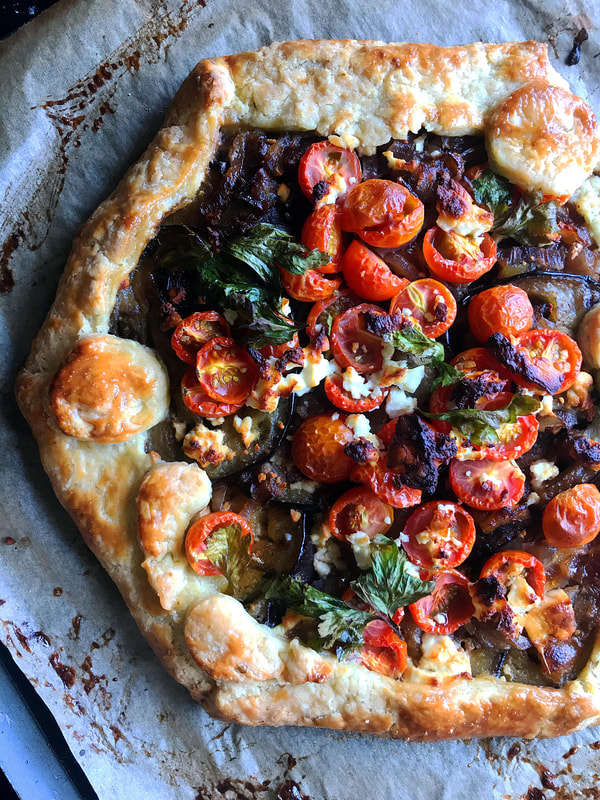 This tasty little number will have friends and family satiated all summer long. We love a good veggie galette as it is an ideal way to take advantage of all those farmers market veggies! Eggplant and tomato are one of those classic duos, like pie and ice cream, peanut butter and jelly, salt and pepper! They've got a thing for each other, they like taking long walks on the beach, sharing margaritas, and always bring out each others best! Creamy, meaty eggplant paired with the acidic sweetness of the tomato is dynamite! And, then, you add in all that luscious feta! Forget about it! All you need is to pour some wine, relax and savor summers bounty. Rustic Eggplant, Tomato and Herb Feta Galette Serves 6-8 1/2 batch of your favorite pie dough or store bought, enough for one disc Filling 6-8 oz. soft feta cheese, plus 1 tablespoon 2 tablespoons milk ½ teaspoon fresh lemon zest 1 large Eggplant, sliced into ¼ inch rounds ½ onion, finely diced 2 cloves of garlic, minced ½ pint cherry tomatoes, halved 1 tablespoon fresh parsley, plus a few leaves for garnish Olive Oil for sautéing eggplant and vegetable, about 1/2 cup 1/2 tsp. sea salt, plus 1/2 teaspoon 1 tsp. pepper 1 egg, beaten Preheat oven to 400 Take your sliced eggplant and sprinkle with 1/2 teaspoon of salt. Let it sit on paper towels for about ten minutes. Place half your olive oil in a sauté pan over medium high heat. Lay in your eggplant and sauté until soft and beginning to brown. Remove and set aside. You may need to do in batches and use more olive oil as eggplants are little sponges. Add more oil to pan and add the onion, garlic, and the rest of your salt and pepper and sauté until soft and beginning to brown. Remove and set aside. In a blender or food processor place 6-8 ounces of feta, milk, lemon zest, and parsley. Blend or pulse until creamy. Roll out your dough on a well-floured surface. Trim sides to get as close to a circle as you can then save the scraps. Move dough onto a parchment lined baking tray preferably without a lip. Spread your feta cheese mixture gently on the dough, keeping a 2-inch rim around the side. Place rounds of eggplant. Top with your halved tomatoes, parsley and the remaining feta. Brush with egg wash and start at twelve o’clock, folding the dough in. Work your way around the tart and use the egg wash to seal your folds. You will get about 6-8 folds resembling an octagon or hexagon. You can stop here and brush with egg wash. Or, reroll scraps and have some fun with cookie cutters, using the egg wash to help stick your shapes to the tart. When done decorating, brush with egg wash. Bake for 40-50 minutes until cheese begins to melt and dough is brown. If it browns too quickly cover with foil and keep baking. 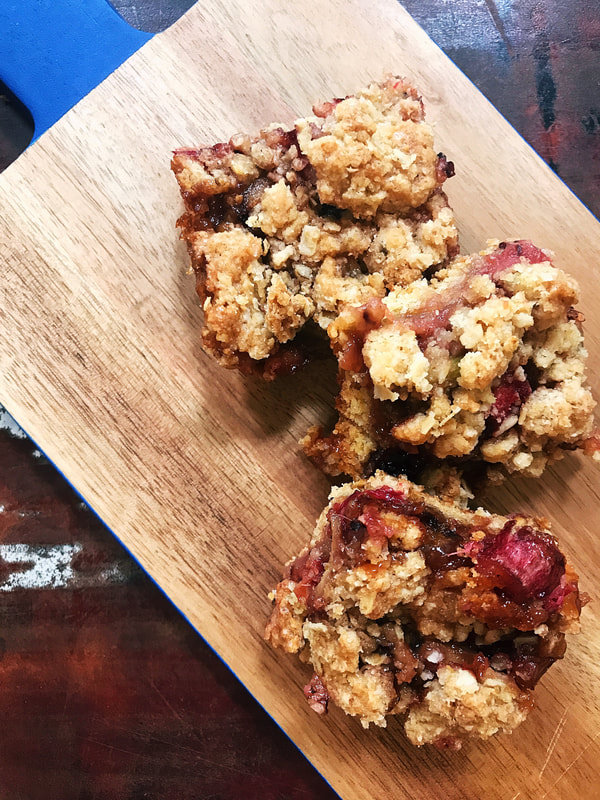 Rhubarb is one of those things that can be a little confusing. Technically, it is a vegetable but "legally considered" a fruit...Now what the heck does that mean? To us, it sort of is like a tomato, which is technically a fruit but eaten as a vegetable. Either way, rhubarb is something special, and if you have never tried it, these bars are an easy way to indoctrinate you into its sweet, tart unique flavor. Raw, it is stringy and super sour, but coupled with some sugar and acid, and baked, the layers of flavor unfold. The mulberry is a perfect counterpoint as these berries are super sweet when ripe, but lack that acidic kick that let's say a blackberry has. So, together you have sweet and tart, and with the oats in the crumble, you have created this delicious dessert that can be breakfast, snacks or topped with ice cream to end a meal. Try it soon, before both are out of season!
Rhubarb and Mulberry Oat Bars makes 1 8inch square baking dish ½ cup brown sugar 1-cup flour ½ cup rolled oats ½ tsp. baking powder ¼ tsp. salt ½ cup butter cut into small pieces 1 egg beaten Zest of 1 lemon 1 cup diced rhubarb about 8 stalks 1-cup mulberries ½ cup sugar ½ cup brown sugar 1 tsp. vanilla extract 2 tsp. tapioca powder or cornstarch Juice of 1 lemon 1 tsp. cinnamon Preheat oven to 375 Grease an 8’ inch cake or Pyrex baking dish. In a medium bowl mix flour, brown sugar, oats, baking powder, salt, and lemon zest. Then add in the cold butter and egg, cutting it in with a pastry cutter or fork. You can also use your fingers to break up any large pieces of butter. Once the mixture resembles crumbs, press half into the pan. In another bowl, add sugar, lemon juice, cornstarch or tapioca powder and Vanilla extract and mix. Carefully stir in fruit. Spread fruit with juices evenly on top of dough and sprinkle with remaining dough. You want some fruit peeking out. Bake 40-45 minutes until fruit is bubbling and topping is golden brown. Cool before slicing. 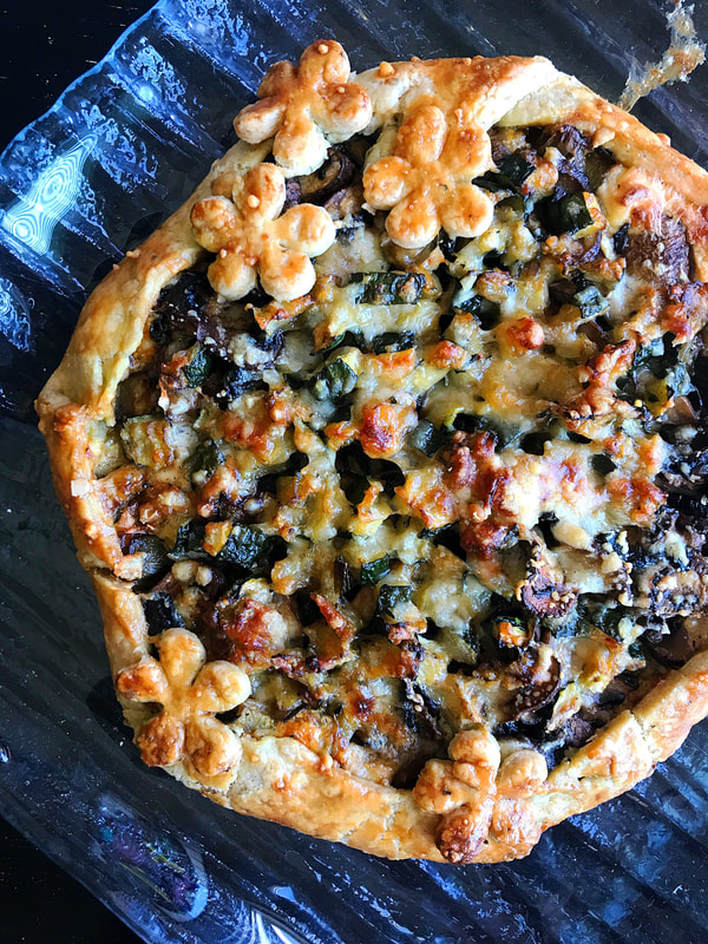 Pies and galettes don't have to just be seen as a dessert. There are lots of ways to eat pies and tarts all day long, and well, that makes us really happy! This tart or galette is inspired by the quiche, but here you don't have the egg or cream. We have taken our basic pie dough which is so versatile that once you have it down, you can create whatever flavor profiles are your favorites, and imparted it with the herbs de provence, a favorite spice composed of things like rosemary, thyme, oregano and marjoram. Once you layer on the cheese, mushrooms, leeks and zucchinis, you have created a savory tart that if you close your eyes you could be transported to Paris and a little cafe on the Rue St. Germaine. All you need is a glass of wine, or two, a side salad, and some nice company to enjoy a tasty lunch. Rustic Mushroom Zucchini and Leek Galette Serves 6-8 1/2 batch of your favorite pie dough or store bought, enough for one disc Filling 6-8 oz. cream cheese, softened or Rondele ½ cup grated Parmesan ½ lb. mixed mushrooms, chopped ½ onion, finely diced or leek 2 cloves of garlic, minced 1 zucchini, diced 1 tablespoon fresh Thyme, minced 1 tsp Zaatar 2 tablespoons Olive Oil 1 tsp. sea salt 1 tsp. pepper Preheat oven to 400 Place olive oil in a sauté pan over medium high heat. Add the onion, garlic, thyme, zaatar, and salt and sauté until soft and beginning to brown. Add zucchini and sauté until tender and beginning to brown. Remove from pan and add your mushrooms. You may need to add a little more olive oil to the pan. Sauté the mushrooms until they are tender and remove them from the heat. Roll out your dough on a well-floured surface. Trim sides to get as close to a circle as you can then save the scraps. Move dough onto a parchment lined baking tray preferably without a lip. Spread your cream cheese gently on the dough, keeping a 2-inch rim around the side. Spread your onion mixture on top, then the mushrooms. Top with Parmesan cheese and a sprinkle of salt and pepper. Brush with egg wash and start at twelve o’clock, folding the dough in. Work your way around the tart and use the egg wash to seal your folds. You will get about 6-8 folds resembling an octagon or hexagon. You can stop here and brush with egg wash. Or, reroll scraps and have some fun with cookie cutters, using the egg wash to help stick your shapes to the tart. When done decorating, brush with egg wash. Bake for 40-50 minutes until cheese begins to melt and dough is brown. If it browns too quickly cover with foil and keep baking. 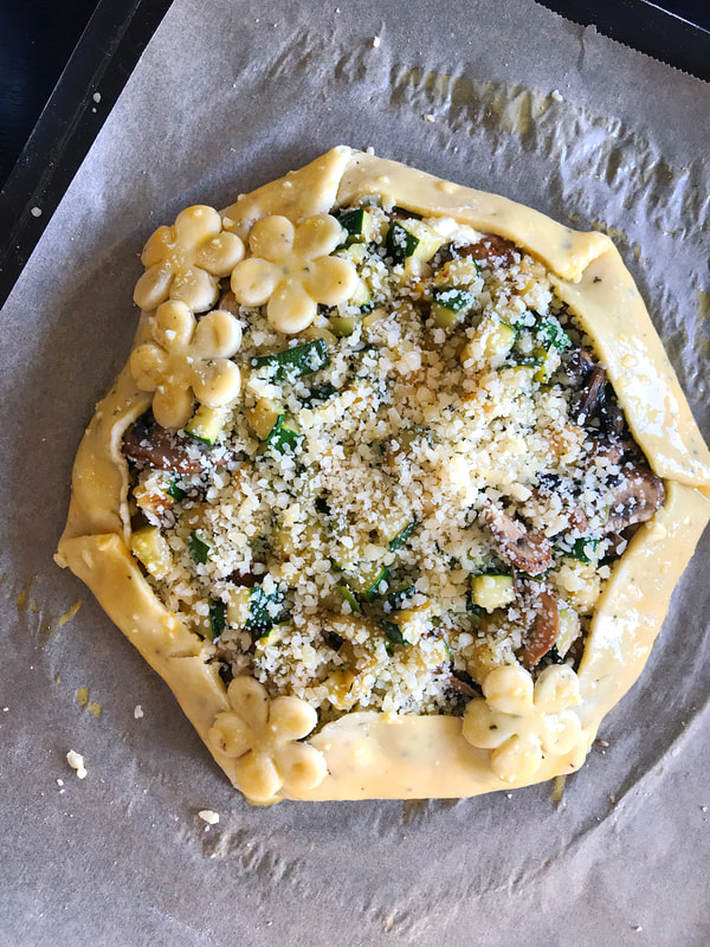 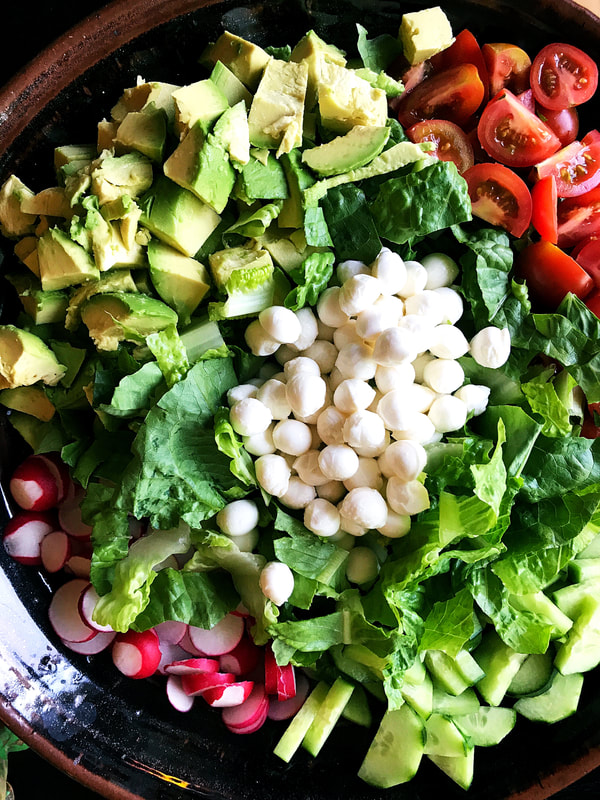 This weekend is for relaxing, or trying to relax and welcome in the summer months. For us that means we are trying to round up one or two bbq's with friends as there is beer to be shared and basketball to be watched. A great salad is a win at any pot luck as it can be the balance to all the crunchy, salty, meaty things happening on a grill. Sometimes its fun to play with herbs and flavors to bring something a little special. This dressing does just that for us, it adds that extra something something. Its a twist on our usual lemon and olive oil classic with the addition of the tarragon and basil. Tarragon is a herb we are just beginning to explore as it has a powerful and specific flavor sort of like licorice, that can easily over shadow. However, in this dressing, that flavor it is nicely balanced with the Dijon mustard and basil and provides the salad, or any salad, with a floral and herbaceous note. The kids love it for dipping carrots, we always keep a little on the side for their "cruditès" and we liked it especially with a grilled chicken breast or two. Try it this weekend and let us know! Fresh Herb and Mustard Vinaigrette Makes about ¾ of a cup of dressing 2 cloves of garlic, peeled Zest and juice of 1 medium lemon 1 tablespoon of water ½ tsp. salt 1/3-cup fresh tarragon 1/3-cup fresh basil 2 tablespoons of Dijon Mustard 2/3 cup Olive Oil *Can sub in flat leaf parley for any of the herbs, or add to the mix Place all ingredients except the Olive oil into a blender. Pulse until garlic and herbs begin to break down and then stream in oil, blending dressing until smooth and creamy. Taste and adjust seasoning. You may need a bit more oil, or salt. Serve with any salad, or as a dip for crudité. It holds up well to hearty lettuces like romaine and grilled vegetables or chicken. 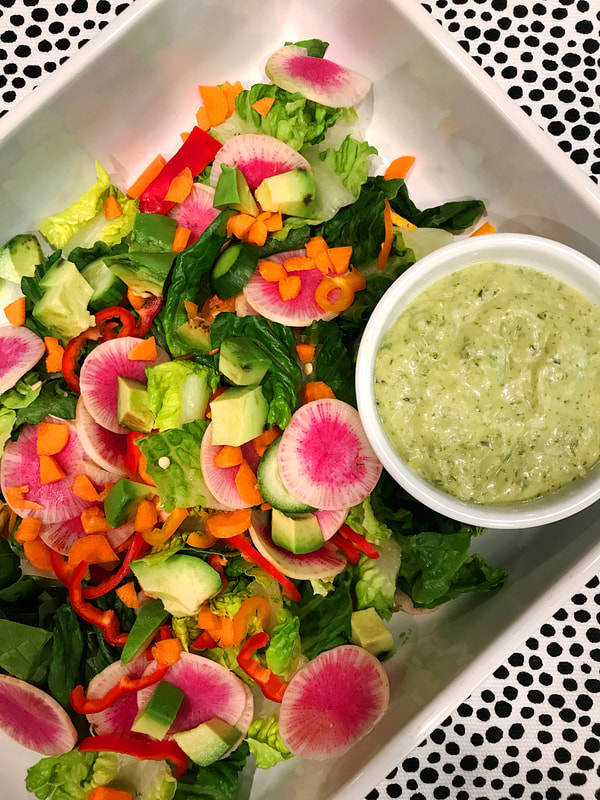 *If you are looking for hostess gifts for the upcoming holidays, be sure to check out our greeting and note cards and our prints on our Etsy site! 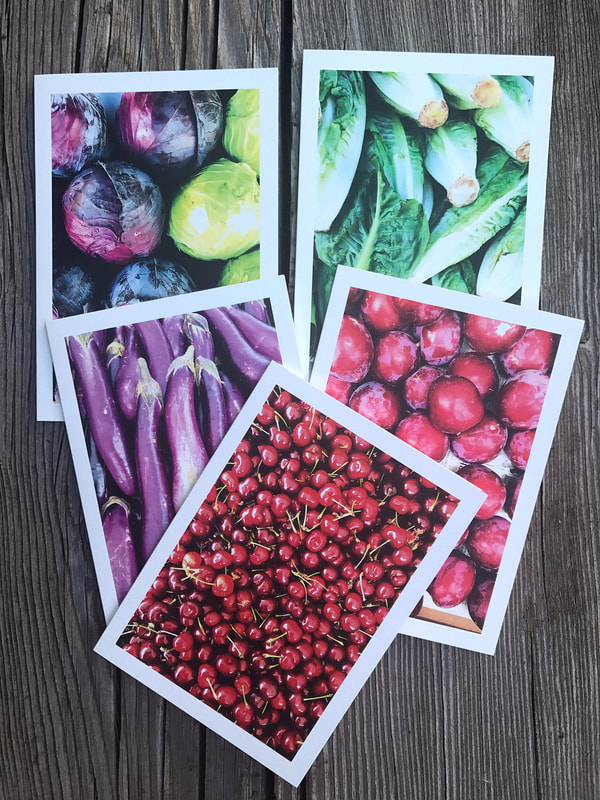 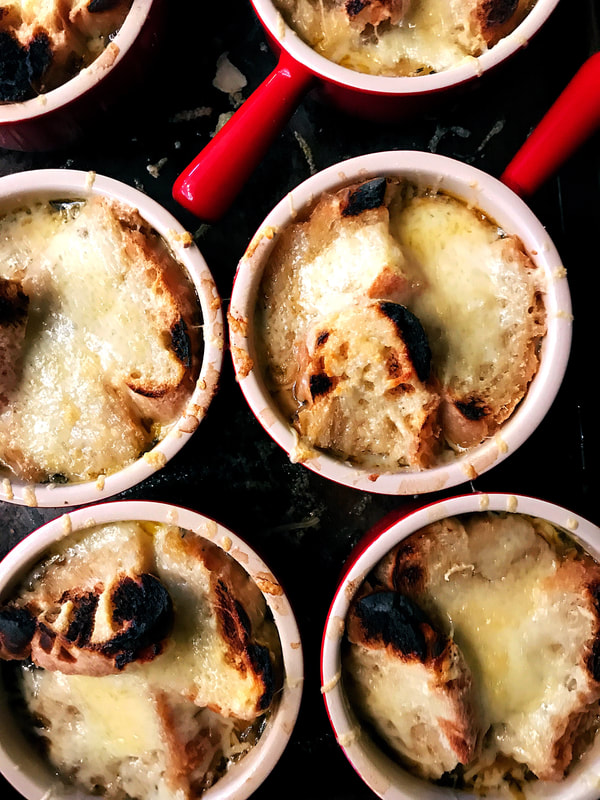 This soup is a family favorite. Every husband, wife and child leaves their bowls clean. It is a very simple soup made with humble ingredients, but the flavors come together to make one of those soul satisfying dishes. The only tough part is cutting all those onions! Our soup has a secret ingredient that gives it a sweet, earthy depth of flavor. By adding a beet, not only do you enhance the natural sweetness of the onions, but together with the thyme, oregano, and the rest of the herbs, you give your soup that little something something that takes it from good to great! French Onion soup 6-8 servings 2 tablespoons olive oil 1-tablespoon butter 6 yellow onions, thinly sliced 1-teaspoon salt 1-teaspoon pepper 1 yellow beet, peeled and diced 3 cloves garlic minced 1 tablespoon dried thyme 1 teaspoon fresh rosemary, minced 1 tablespoon fresh oregano, minced (you can use dried if you don’t have) 2 tablespoons balsamic vinegar 1-teaspoon sugar 6 cups beef or vegetable broth 2 cups water For topping ½ baguette, cubed (you want to use a harder bread) 1 to 2 tablespoons olive oil 2 cups Gruyere cheese, grated ½ cup Parmesan cheese grated Place butter and olive oil in Dutch oven and add onions. Saute over medium heat and add salt and pepper. When onions begin to turn translucent, about 5 minutes, add beets, garlic, thyme, rosemary and oregano. Continue to sauté over medium heat for another 10 minutes, stirring occasionally. Add balsamic and sugar, cover, and stir every few minutes. You are looking for the onions to caramelize, turning a medium brown color. This will take about 30 minutes. When onions look soft and caramelized add stock and water. Bring to a boil then turn heat down and simmer for 30 minutes. Check seasoning and adjust salt and pepper. Preheat oven to 400. Toss cubed bread and olive oil and toast on sheet pan until lightly toasted. You don’t want the bread to color, but you do want a crust. Divide soup among ovenproof soup bowls. Top each individual soup with a handful of cubed bread and a generous handful of each cheese. Place under broiler until bubbly and beginning to brown. Serve! 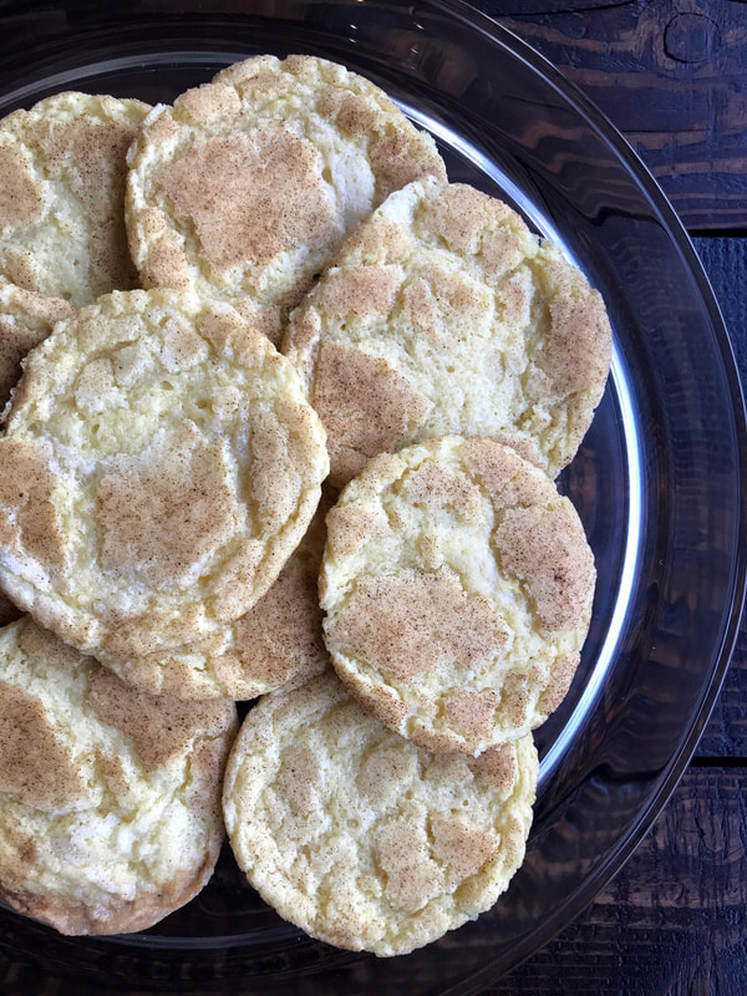 The kids are obsessed with snickerdoodles, so to keep things interesting for us, we had to play around with the flavors. While we are solidly on team chocolate chip, the addition of the chai influenced spices took this cinnamon sugar cookie to new heights. By adding the ginger, cardamom, cloves and allspice, the cookie went from a childhood favorite to something a little more grown-up. We will make this version any time. Salted Butter Chai Spiced Snickerdoodles Makes about 12-15 cookies ½ cup room temperature salted butter ¾ cup sugar 1 egg 1 1/3 cup flour ½ tsp. baking soda 1 tsp. cream of tartar ½ tsp. salt 2 tablespoons sugar 1 tsp. cinnamon ½ tsp. ginger ¼ tsp. cloves ¼ tsp. allspice ¼ tsp. cardamom Preheat oven to 350 Line a baking sheet with parchment and set aside. In a stand mixer with the paddle attachment, cream the butter and sugar together until light and fluffy. While the butter and sugar beat, in a bowl whisk together the flour, baking soda, cream of tartar and salt. Add egg to sugar and butter and mix well, then add the dry ingredients. Mix until incorporated. Mix rest of sugar and spices in a bowl. Pinch off a piece of dough and roll into about 1 inch balls. Roll until covered in cinnamon sugar and place on baking sheet about 2 inches apart. Cookies will spread. Bake for about 9-11 minutes and cool on tray. 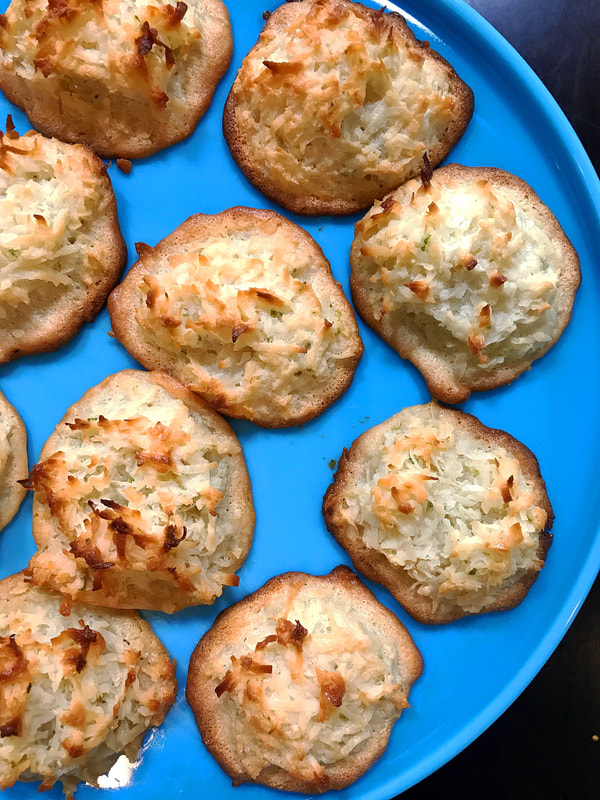 We are so excited to participate again in #margaritaweek organized by Kate Ramos of @holajalapeno. Last year, we did a strawberry margarita cookie which proved to be a delicious surprise, so we thought, hey, let's try to bake something else! While we do love a great margarita, they aren't in heavy rotation here as Mom is a vodka lady and I truly am a beer girl at heart. But, we both love a good cookie. This is a riff on the classic gluten-free coconut macaroon. We've added lime and tequila so you can imagine you are drinking your favorite Mexican cocktail while you scarf down a few cookies. They are not the prettiest cookie on the block, but they are chewy, sweet and have just a hint of citrus tang. Try them and dream of your next beach vacation! Be sure to check out the hashtag and Kate's website, for over a hundred recipes all through the week! Check them out here!
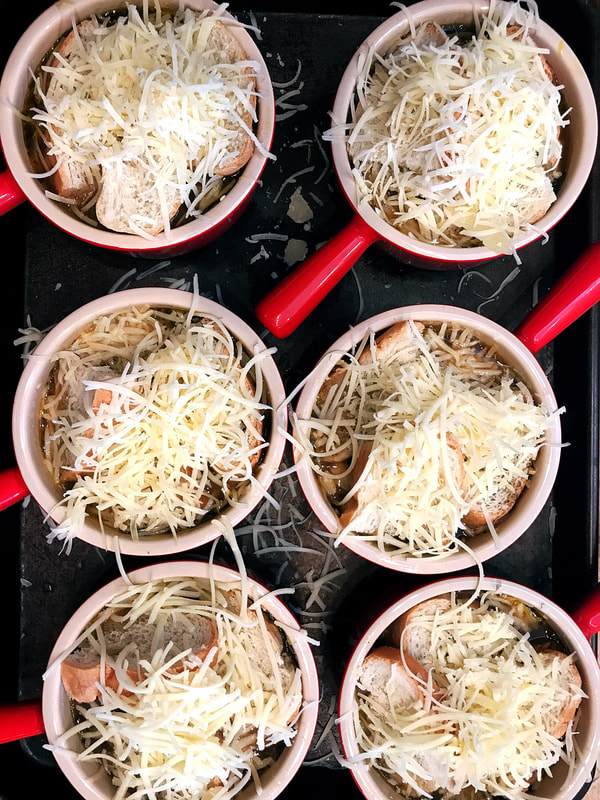
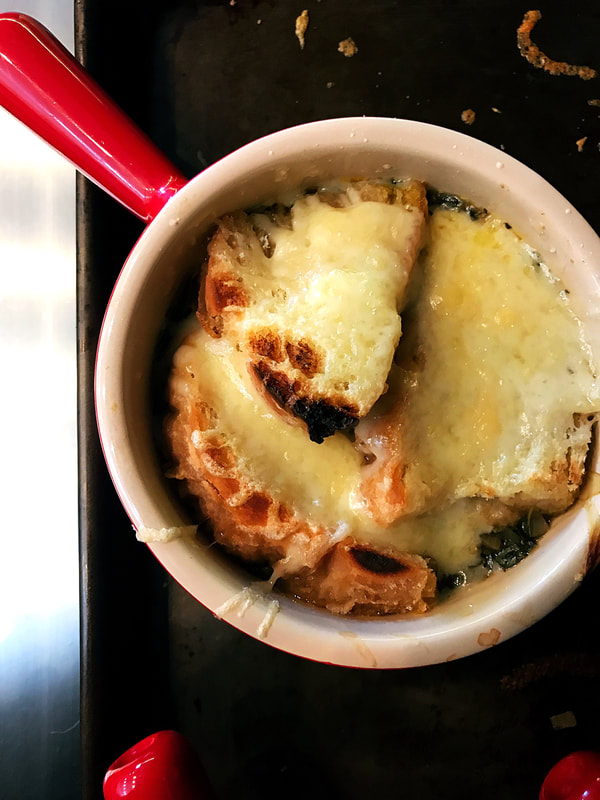
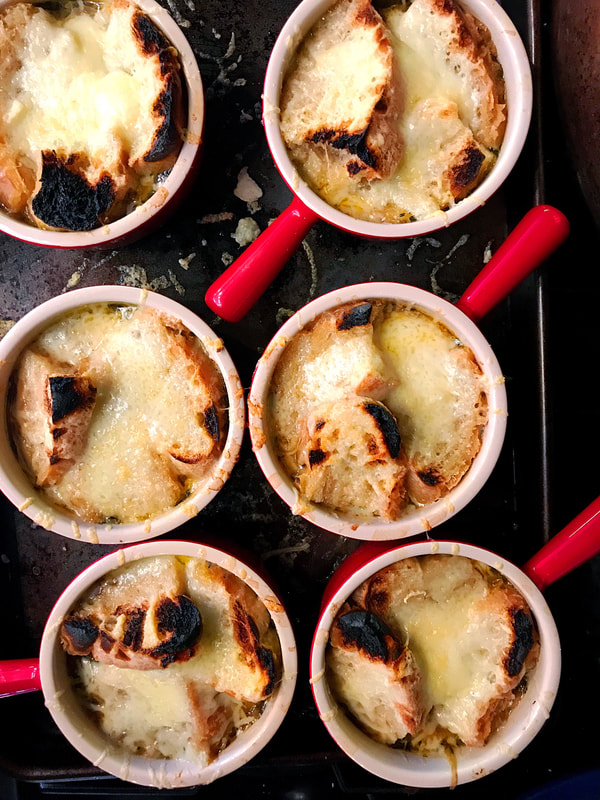
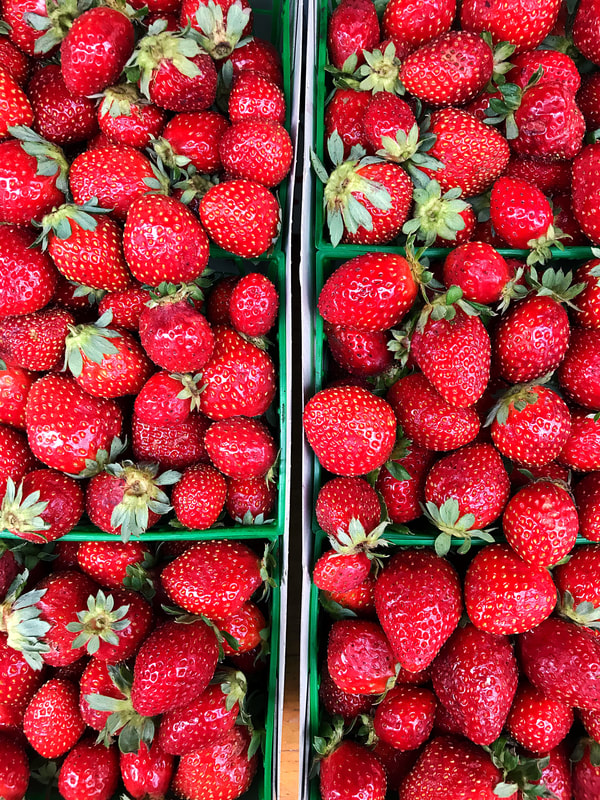
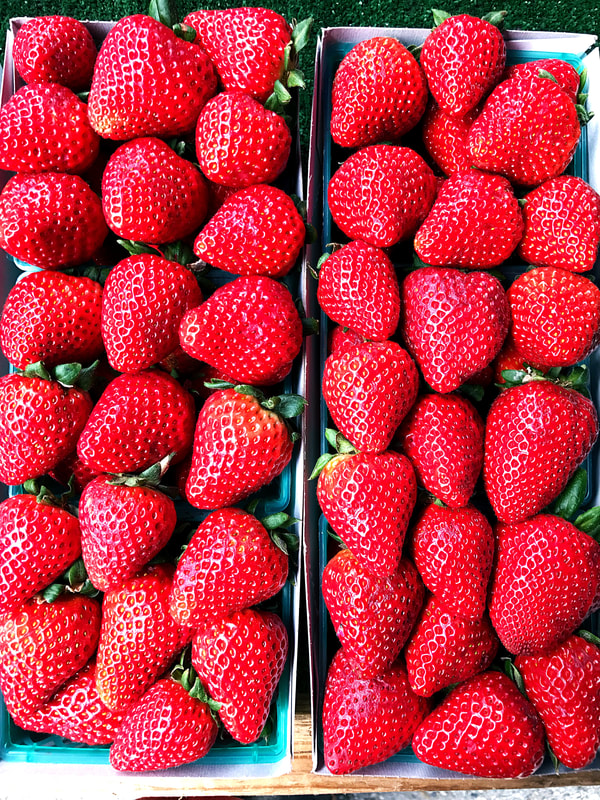
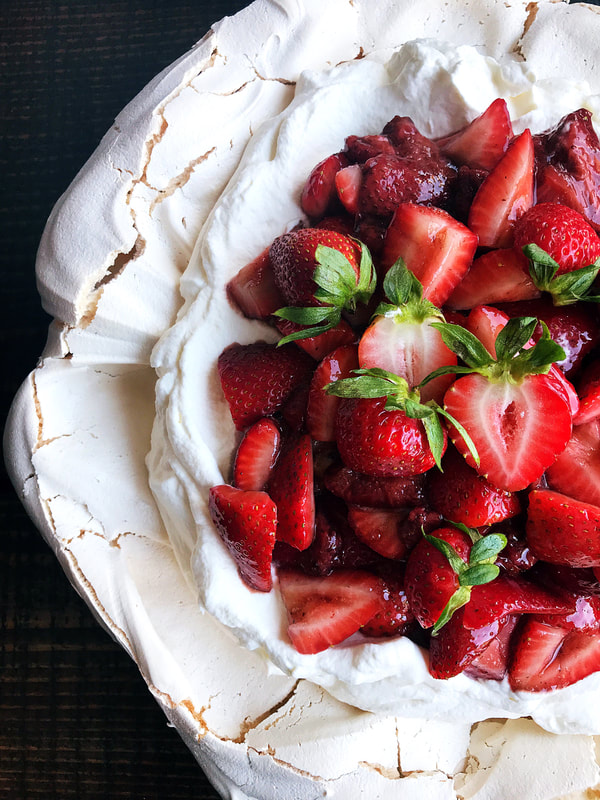
Put the Lime in the Coconut Margarita Macaroons Makes about 18-20 cookies 14 oz. sweetened shredded coconut (one package) 14 oz. condensed milk (one can) 1-tablespoon tequila 2 egg whites ¼ tsp. salt 2 tsp. lime juice Zest of 1 lime Preheat oven to 325 Stir together the coconut, condensed milk, lime zest, lime juice, and tequila until incorporated. In a mixer, beat the egg whites and the salt until you have stiff peaks. Fold the egg whites into the coconut mixture. (If you loosen the mixture with a little egg white first, then add the rest you maintain more loft.) On a parchment lined baking sheet, drop 1 tablespoon of mixture, leaving about 2 inches between cookies. Bake 25-30 minutes until golden brown. Cool completely on tray. 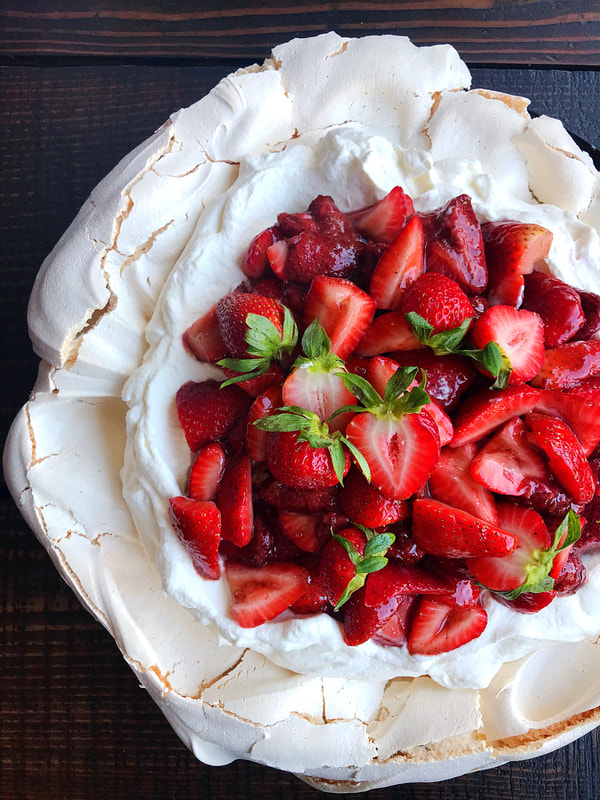 We can hardly believe we have come full circle and are celebrating a year of ingredient based Instagram collaborations! What started with just a handful of amazing food bloggers and foodies has spread to a world wide collective of food artists. This network of people keeps our feeds buzzing with their talents and creativity, and every day we are amazed by what people can do with but a few ingredients! We started with the pea, moved to summer peaches, fall apples and winter carrots and now, here we are back to spring and well how could we resist?!?! Strawberries are the epitome of spring, their juicy sweetness signaling the summer bounty to come. We had to see what everyone would make with this delicious and photogenic berry! Who doesn't want to see what pie Jo of @jojoromancer designs? Or what baked treats from Becky of @bakingthegoods and @thidabevington make? Or, whatever tasty creations our partners in cooking, Annie from @whatannieseating and Joy from @joyosity come up with? We have lots of new participants this time and at the bottom of our post we will list as many links as we can, so you can check out all the inspiration. We can't wait to get our strawberry on! We made a longtime favorite with a new twist for our contribution to #strawberriesarethejam. We have been making some version of a meringue with chocolate, whipped cream and fruit for Passover for as long as we have been cooking together. It is always a favorite as who can resist mounds of just sweet enough whipped cream and crunchy meringue? The combo is bananas! We decided to ditch the chocolate for this one, sorry everyone, and go with a slightly more sophisticated approach. By roasting some of the berries and leaving some raw you get this jammy strawberry flavor bomb that is sweet, a little savory, and completely delicious. With the pavlova, by adding the corn starch and the vinegar, instead of just straight meringue bases that are all crunch, you get the pillowy, marshmallow center that is just heavenly! The cream, the berries, the meringue, those are our jam!!! Roasted Balsamic Strawberry Pavlova Serves 10 For Meringue Pavlova 8 egg whites ¼ tsp. salt 2 ½ cups fine sugar 4 tsp. cornstarch 2 tsp. apple cider vinegar ½ tsp. almond extract Preheat oven to 350 Line a baking tray with parchment paper. In a mixer fitted with a whisk attachment, add the egg whites and salt, and beat until foamy and white. Gradually add in the sugar bit by bit on medium high and whisk until egg whites are stiff and glossy. You will know they are done when you take a little and rub it in between your thumb and finger. There should be no grains of sugar. Once stiff and glossy, sprinkle the cornstarch in and the almond extract and fold into the egg white mixture gently. Scoop the mixture onto your prepared tray and shape into a circle, flattening it a bit in the center. Place in oven and immediately reduce the heat to 250 and bake for 1 hour and 15 minutes. Turn off the oven, do not open and cool completely in the oven. Balsamic Roasted Strawberries 2 pints of strawberries, de stemmed, hulled and halved 2 tablespoons sugar 1-tablespoon balsamic vinegar Pinch of pepper 1/8 tsp. of salt 1 tsp. almond extract Preheat oven to 350 Place everything in a baking dish and gently fold. Arrange in one layer and bake for about 20 minutes. Let cool and scrape all into a bowl and set aside. For the topping of the Pavlova 2 cups heavy cream 1 tablespoon powdered sugar 2 pints strawberries, de-stemmed, hulled and quartered. 4 strawberries cut in half for garnish, with the tops on 1-tablespoon sugar Beat the cream with the powdered sugar until you have soft peaks. Set aside. Mix the quartered strawberries with the tablespoon of sugar, and the balsamic roasted strawberries. Take your meringue base and place on your serving tray. Mound the whip cream on top, leaving an inch ring around the sides. Add your strawberries, leaving another inch ring around the cream, Garnish with the halved strawberries and serve! Here is the list we promised of all the contributor's recipes! Some have links to their strawberry creations, so go check them out and give them a follow!!! The Cooking of Joy’s Strawberry Matcha Cream Cheese Tart This Healthy Table’s Strawberry Tahini Shortcake Flours in Your Hair’s Strawberry Milk Donuts The Wood and Spoon’s Strawberry Icebox Pie Smart in the Kitchen’s Rustic Strawberry Galette The Herb and Spoon’s Strawberry-Jam Filled Brioche Donuts Better with Biscuit’s Strawberry Cobbler My Kitchen Love’s Strawberry Rhubarb Tart Sift and Simmer’s Rose Strawberry Hibiscus Mille Crepe Cake What Great Grandma Ate’s No Bake Strawberry Cheesecake Bars (Paleo, Vegan) A Modest Feast’s Greek Yogurt With Crispy Quinoa and Roasted Strawberries Hola Jalapeno’s Strawberry Pink Peppercorn Margarita Worthy Pause’s Strawberry-Basil Shrub Cocktail Hot Dishing It Out’s Panna Cotta with Strawberry Jelly Figs & Flour’s Shrimp Tacos with Strawberry Apricot Salsa Pie Girl Bakes’ Strawberry Ginger Pie Crumb Top Baking’s Strawberry Chia Jam Oat Bars The Gourmandise School’s Strawberry Pistachio Salad Tiny Kitchen Caper’s Strawberries and Cream Pound Cake Cook Til Delicious’ Mini Chocolate Cake with Strawberry Ganache Something New For Dinner’s Watermelon, Tomato and Strawberry Salad with Burrata A Spicy Perspective’s Fresh Strawberry Yogurt Cake Easy and Delish’s Strawberry Brigadeiros Plays Well with Butter’s Strawberry Salad with Goat Cheese, Grilled Chicken, & Maple Balsamic Vinaigrette Katherine in Brooklyn’s Roasted Strawberry Balsamic Ice Cream Sugar Salt Magic’s Strawberry Mousse Tart The Healthy Sins’ Coconut Flour Crepes Topped with Fresh Strawberries and Coconut Yogurt Lemon Thyme and Ginger’s Strawberry Basil No Churn Ice Cream Jessie Sheehan Bakes’ Strawberry Basil Turnovers Bavette Meat & Provisions’ Pickled Green Strawberries Rezel Kealoha’s Apple Cider Rose Poached Strawberries with Thyme Flowers Made from Scratch’s Roasted Strawberry and Basil Ice Cream Eat Cho Food’s Strawberry Basil Glazed Donuts What’s Karen Cooking’s Strawberry Eton Mess More Icing Than Cake’s Strawberry, Balsamic & Black Pepper Babka Well Seasoned Studio’s Classic Vanilla Layer Cake with Mascarpone Buttercream and Fresh Strawberries Farm & Coast Cookery’s Strawberry & Thyme Shortcake Marianne Cooks’ Strawberry Madeleines Clean Plate Club’s Mini Strawberry Bundt Cakes with Lemon Glaze My Berkeley Kitchen’s Strawberry Kale Salad with Balsamic Vinaigrette The Cinnaman’s Rose Hibiscus Strawberry Icebox Pie Prickly Fresh’s Strawberry Burrata Kale Salad with Pistachio & Lemon VinaigretteMaren Ellingboe’s Angel Food Cake with Whipped Cream & Strawberries Baking the Goods’ Mini Strawberry Lemon Cupcakes Fufu’s Kitchen’s Vegan Strawberry Ice Cream Sandwiches What Annie’s Eating’s Vegan Strawberry + Basil Ice Cream Katie Bird Bakes’ Strawberry Crumble Bars Cosette’s Kitchen’s Strawberry Shortcake Blossom to Stem’s Strawberry Pavlova with Mezcal and Lime Babby Girl Yum’s Strawberry Spinach Almond Salad It’s a Veg World After All’s Butter Lettuce Strawberry Salad with Poppyseed Dressing Le Petite Eats’ Strawberry Orange Blossom Tartlets Cooking with Cocktail Ring’s Basil Balsamic Strawberry Shortcake Ful-Filled’s Lilac Sugar Strawberry Shortcakes with Greek Yogurt Whipped Cream The College Housewife: Mixed Berry Whiskey Crisp What Annie’s Eating’s Vegan Strawberry + Basil Ice Cream Flotte Lotte’s Strawberry Ice Cream Sandwiches Rumbly Tumbly’s Strawberry Scones A Small Kitchen in Genoa’s Italian Riviera Strawberries Salad Reencontrándome con la Cocina’s Chocolate Meringue with White Chocolate Mousse and Strawberries Clean Plate Club’s Mini Strawberry Bundt Cakes with Lemon Glaze Just Date Syrup’s Strawberry Date Syrup Oat Crumble Well Fed Soul’s Strawberry Almond Mascarpone Cake Food Solutions’ Strawberry Soup (Savory and Sweet) Champagne and Cookies’ Strawberry & Sesame Whole Wheat Pop Tarts with Strawberry Tahini Glaze Jessie Sheehan Bakes’ Strawberry Basil Turnovers Annie Campbell’s Strawberry Pavlova An Amazing Appetite’s Vanilla Strawberry Tart Cocoa and Salt’s Strawberry Pistachio Tart Frosting and Fettuccine’s Strawberry Basil Layer Cake with Strawberry Simple Syrup No More Mr. Nice Pie’s Fresh Strawberry Pie 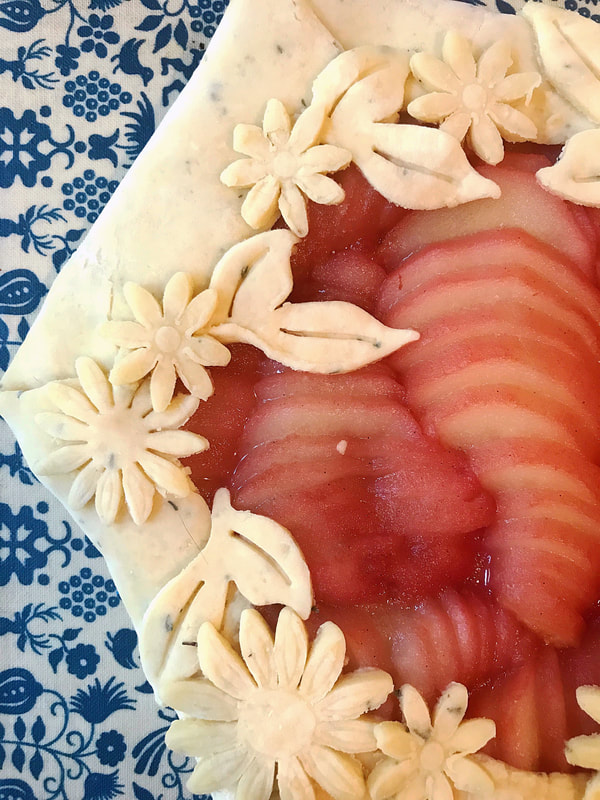 This lovely little tart was inspired by a collaboration with Muddy Boot Wines. We were charged with showcasing their tasty Rose and we decided to bake with it. Pear and rose seemed like a wonderful combination, and poaching the pears in the wine proved a delicious idea. By adding the cinnamon, ginger and vanilla to the wine, the sweetness of the pears was enhanced. The thyme in the crust added another herbal element that made the tart feel like the best pieces of a cheese plate thrown together. Rose Poached Pear Tart Makes 1 tart serves about 6 1/2 batch of your favorite pie dough, or store bought. Enough for one disc. 1 bottle rose wine ½ cup sugar 1 ½ inch piece of ginger, peeled ½ of a lemon’s peel 1 vanilla bean 2 cinnamon sticks 5 ripe pears, peeled and cored 1/2 tsp fresh thyme, minced. Preheat oven to 375 Take your vanilla bean and cut in half the long way, then scrape, adding both the bean and scrapings to a wide sauce pan. Add wine, sugar, lemon zest, ginger and cinnamon stick. Bring to a boil over high heat, stirring just until sugar has dissolved. Reduce heat to medium and simmer for 3 minutes to blend flavors. Gently place pears into poaching liquid. You may need to cover with parchment or a towel to insure the pears are submerged. Simmer until pears are tender when pierced with a knife, 15 to 25 minutes, depending on ripeness. Use a slotted spoon to transfer pears to a large bowl. Bring poaching liquid to a boil until liquid has reduced and thickened slightly, 20 to 25 minutes. Strain and reserve. Roll out half, one disc, of your dough on a well-floured surface. Trim sides to get as close to a circle as you can then save the scraps. Move dough onto a parchment lined baking tray preferably without a lip. Sprinkle with minced time. Slice pears about 1/8 inch thick and try to keep in their halved shapes, then slightly fan them out. Place fruit in middle of the dough, on top of the thyme, fanning the pears as you go, leaving about a two-inch rim around the sides. Brush with egg wash and start at twelve o’clock, folding the dough in. Work your way around the tart and use the egg wash to seal your folds. You will get about 6-8 folds resembling an octagon or hexagon. You can stop here and brush with egg wash, then sprinkle with sugar. Or, reroll scraps and have some fun with cookie cutters, using the egg wash to help stick your shapes to the tart. When done decorating, brush with egg wash and sprinkle dough with sugar. Brush pears with reserved liquid. Bake for 40-50 minutes until fruit is bubbling and dough is brown. If it browns too quickly cover with foil and keep baking. 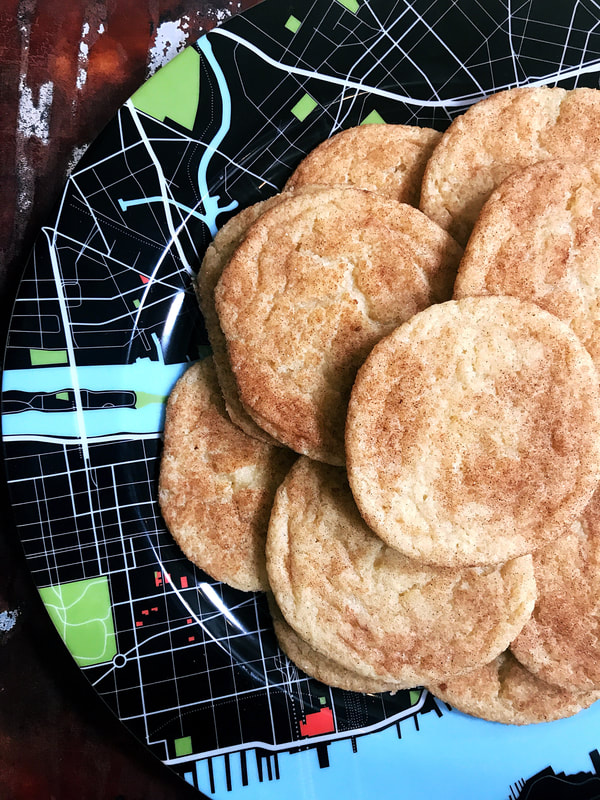 We normally are not snickerdoodle fans, our love falls somewhere in the dark chocolate peanut butter cookie zone. But, the kids, and some of the big kids, meaning the adults in the family certainly are. The littlest requested this cookie after many batches of Alison Roman's Instragram famous Salted Butter Chocolate Chunk Shortbreads found their way into the cookie jar. To be fair and kind, we said yes and got making the snicks as we like to call them. However, we needed a little twist on this cookie to satisfy our more salty palate, as a snick can veer to the sweet side. So, thinking about one of the reasons why we loved her cookie so much, we experimented with using salted butter and boom! Heaven! The cookie gets just a little salty bite mixed in with all that cinnamon sugar goodness. These are easy to make and the kids loved rolling them in the sugar, so get baking!! Salted Butter Snickerdoodles Makes about 15 cookies ½ cup room temperature salted butter ¾ cup sugar 1 egg 1 1/3 cup flour ½ tsp. baking soda 1 tsp. cream of tartar ½ tsp. salt 2 tablespoons sugar 1 tsp. cinnamon Preheat oven to 350 Line a baking sheet with parchment and set aside. In a stand mixer with the paddle attachment, cream the butter and sugar together until light and fluffy. While the butter and sugar beat, in a bowl whisk together the flour, baking soda, cream of tartar and salt. Add egg to sugar and butter and mix well, then add the dry ingredients. Mix until incorporated. Mix rest of sugar and cinnamon in a bowl. Pinch off a piece of dough and roll into about 1 inch balls. Roll until covered in cinnamon sugar and place on baking sheet about 2 inches apart. Cookies will spread. Bake for about 9-11 minutes and cool on tray. 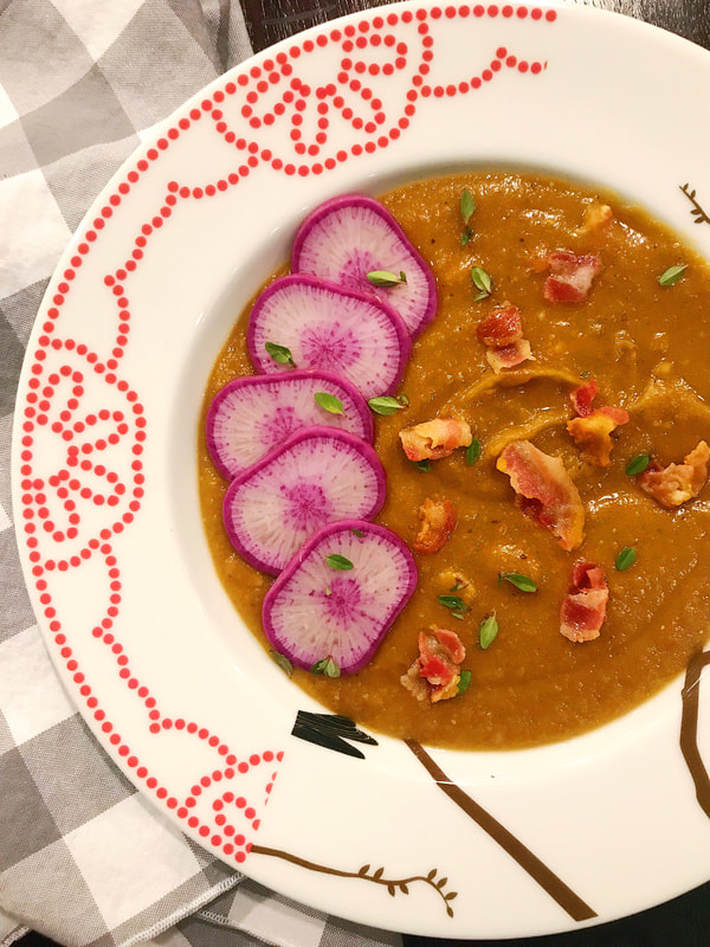 Yes, it even gets cold in Los Angeles and lately, its been downright chilly! It felt right to create some new soup recipes and this one was inspired by the husbands. Both scoff at soup most of the time, deeming it an appetizer or side dish, and always asking after where was dinner, but both love this soup. By adding the pancetta the soup takes on a heartier flavor, imparting that meatiness they love. The paprika and Zaatar take the soup out of the deli and their basic version, and elevate the soup with depth of flavor and smokiness. One child rejected the soup outright, and the other scarfed it down. Perhaps, he will follow in his Dad's footsteps and embrace the pea.... soup that it is! Serve it with a crusty baguette and everyone will feel satiated.
Yellow Split Pea Soup with Pancetta Serves 4-6 2 cups yellow split peas (use green if you want) 4 cups chicken stock (can sub veggie stock) 3-4 cups water 1 onion, diced 3 cloves garlic, minced 5 carrots, peeled and chopped 4 stalks of celery, chopped 1 tablespoon fresh thyme, minced 4 ounces of Pancetta, chopped into small pieces or use pre-cubed 1 tablespoon Zaatar 1 teaspoon smoked paprika 1-teaspoon turmeric 1 teaspoon salt plus more to taste 2 tablespoons olive oil In a large soup pot, brown the pancetta over medium high heat. You can use a dry pan, as meat will give off its own fat. When the meat is almost crisp, remove from pot and set aside. Add olive oil to the drippings and then the onions and teaspoon of salt. Cook the onions over medium heat until they begin to soften, and then add the carrots, garlic and celery. Stir and cook for a few minutes, letting some bits begin to brown. Add in your spices and stir. Cook for one minute then add the peas. After another minute or two add in your liquids and stir. Bring to a boil then reduce heat and simmer for about forty minutes, until peas and veggies are soft. In a blender, blend the soup and return it to the pot. Stir in the reserved pancetta and serve the soup with crusty bread! 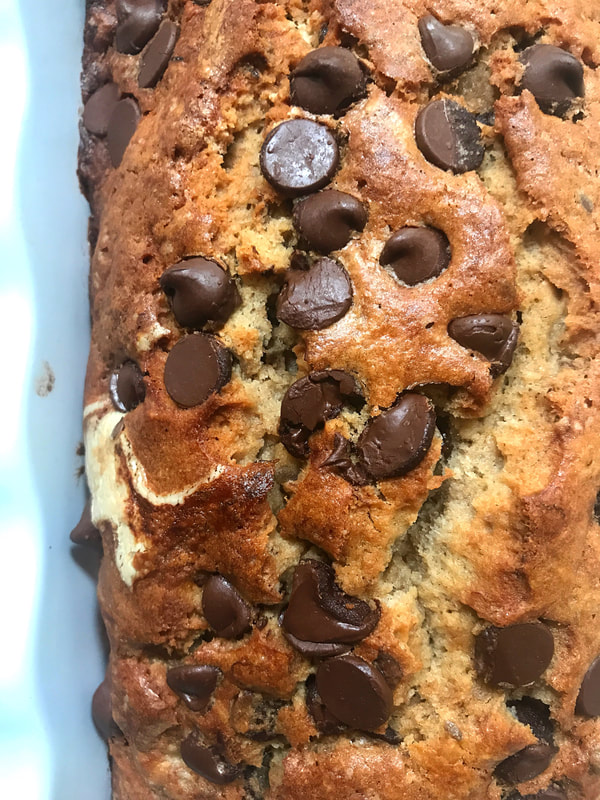 We haven't made banana bread for awhile, so when we spotted some brown bananas in the fruit bowl, it was time to revisit the trusty favorite. However, then we realized while we had the right bananas we had no flour, too much pie and bread making going on! We did have a bag of gluten-free flour on hand from out gluten-free pie dough experimenting, so we thought we would give it a try. As we were experimenting anyway, we tried adding in some tahini and flax to play with texture and flavor. There have been a lot of recipes we have read lately using tahini is sweets, and we are digging the nutty sesame flavor it imparts. So far, as the loaf is half-way gone, no one has even suspected it is gluten-free, and the tahini gives it this unexpected buttery flavor. Looks like a win all the way around!!!
Gluten-Free Tahini Banana Bread with Chocolate Chips makes one loaf 1 1/3 cups gluten-free flour (we use Cup4Cup) ¾ teaspoon salt ½ teaspoon baking powder ¼ teaspoon baking soda ½ teaspoon cinnamon 5 tablespoons unsalted butter, softened 3 tablespoons tahini 1 tablespoon flax seeds 1/3 cup brown sugar 1/3 cup sugar 2 large eggs lightly beaten 1 tsp. vanilla extract 2 very ripe bananas, mashed ½ cup chocolate chips or you can omit chocolate and add ½ cup chopped nuts Preheat oven to 350 and grease a 6-cup loaf pan, or line with parchment. Whisk all dry ingredients together in medium bowl. In a stand mixer or using a large bowl and a hand-held mixer, beat on high speed the butter and the sugars until lightened in color and fluffy. Add Tahini and mix well. Add the dry ingredients and beat until the mixture resembles sand, making sure to scrape down the sides. Slowly add in the beaten egg, a little at a time, and then add vanilla. When combined, carefully fold in banana and chocolate chips (or nuts). Scrape into prepared pan and bake about 60 minutes until a toothpick inserted in the center comes out clean. Let cool entirely before unmolding. If you omit the chocolate chips bump sugar up to ½ cup sugar, and ½ cup brown sugar. Also, if the bread is browning too quickly, cover with tinfoil and continue baking 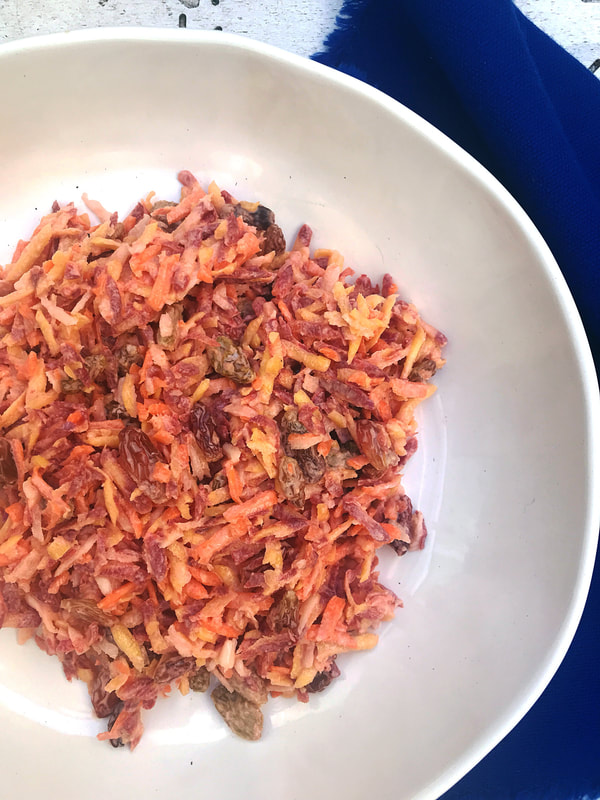 This carrot salad is a healthier version of the classic carrot and raisin salad. We switched out the mayo and used the greek yoghurt instead. You get the same creamy consistency without some of the fat. You can use whatever carrots you have on hand, but we have a fondness for the the rainbow ones as the kids love eating the rainbow! We made the recipe with this lovely JUST DATE SYRUP we got in the mail, which is just that, date syrup, an alternative sweetener that is a healthier low-glycemic index sweetener. Certainly worth a try, however, use whatever you have on hand. Agave and maple syrup will do. The salad gets better over time, so be sure to let it sit for the 3 hours in the fridge.
Rainbow Carrot Raisin Salad makes about 3 cups 3 cups shredded carrots, about 6 large carrots ¼ cup plus 1 tbsp. of Greek Yoghurt ½ cup raisins 2 teaspoon lemon juice 1 teaspoon apple cider vinegar 1/2 teaspoon of salt 1 teaspoon date syrup, agave, or maple syrup Place raisins in hot water to rehydrate, drain. Mix lemon juice, apple cider vinegar, greek yoghurt, salt and sweetener in a medium bowl. Add shredded carrots and raisins and stir. Refrigerate 2-3 hours prior to serving. 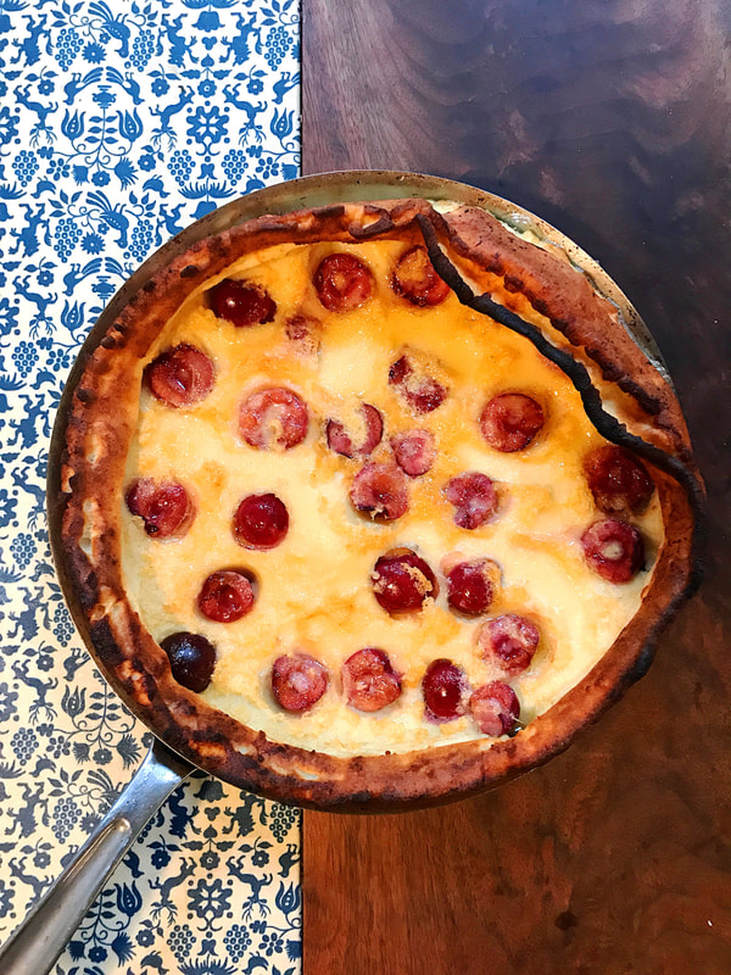 We have always been a puff pancake, dutch baby kind of family. There is the drama in the puff, and the delicate sweetness and custardy texture is a favorite. In all honesty, we would rather make one big pancake instead of many little ones so we can actually eat breakfast with everyone as opposed to standing by the stove working batches! This one was inspired by that classic combination of cherries and vanilla. The fruit inside makes it sort of like a French clafoutis, another custardy dessert we love. You can sub any berry in, but the cherries pack a nice sweet tart punch! Be sure to have everyone siting when you pull it from the oven as the puff doesn't last long!
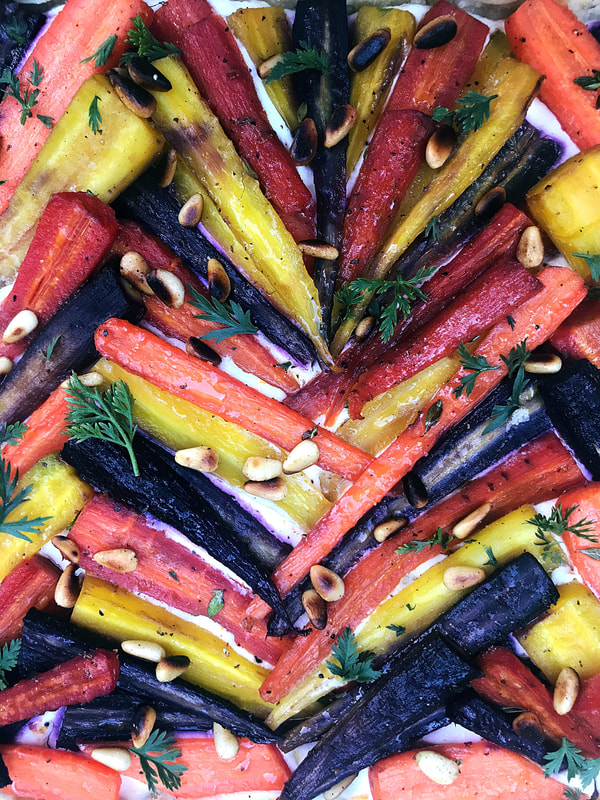
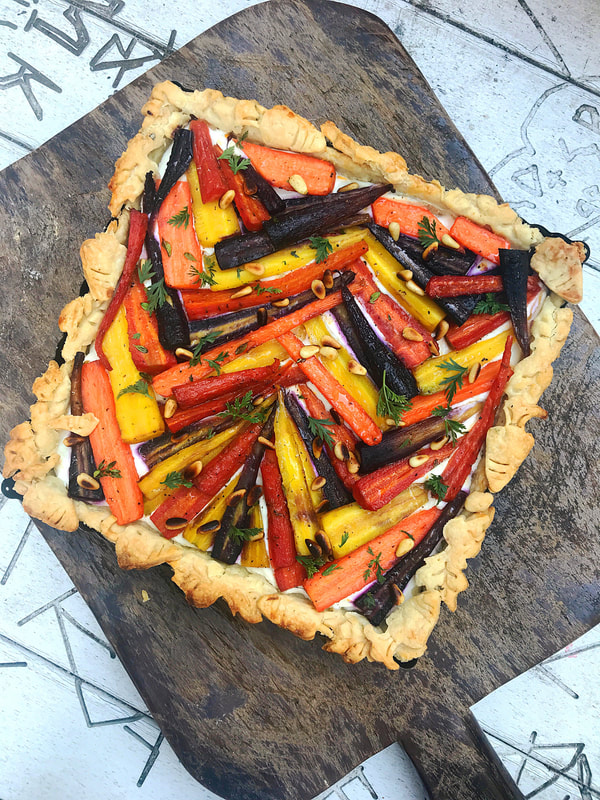
Cherry Vanilla Dutch Baby serves 4-6 in 9 inch oven proof skillet 3/4 cup milk 3/4 cup flour 1/3 cup sugar 3 eggs 1/2 cup cherries, pitted and halved 6 tablespoons butter 1 tsp vanilla extract 1/2 tsp. vanilla bean paste (if you can't find add one more tsp. vanilla extract) Preheat oven to 425 Whisk together the flour, milk, eggs, sugar and vanillas until smooth. In an oven proof 9 inch skillet melt butter and swirl along the sides of the pan. Add batter and scatter cherries on top. After about 1 minute, place in oven and bake for 12-15 minutes. Pancake will be puffed and golden brown. Serve immediately with syrup or jam or a squeeze of lemon! 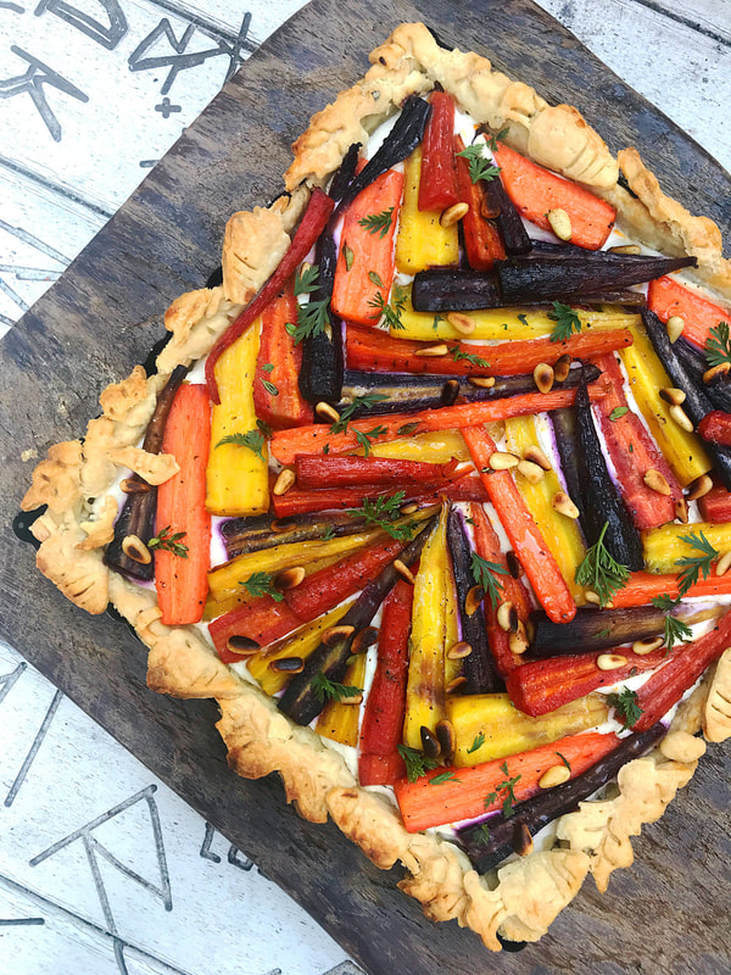 How can it be February already? It seems like just yesterday we were celebrating all things apple with our #aisforalltheapples collaboration. We were blown away by everyone's creativity and approach to the same ingredient. We had pies, tarts, salads, and even cocktails showing off their apply goodness all over instragram. Now, we have put out the call along with @whatannieseating, and our wonderful collaborators are getting crazy with the CARROT! With returning chefs and bakers like @jojoromancer, @bakingthegoods, @smartinthekitchen and @champagneandcookies and some amazing new talents like @lokokitchen, @rushyama, @dianemorrisey and @candacenelson, we bring to you #24carrotgoals. Can you believe this is our 4th ingredient based instagram collaboration? From peas to peaches to apples and now to carrots, we celebrate the bounty of nature! We were lucky to receive a box of the most beautiful carrots from Babe Farms. We couldn't help but get excited when we saw the yellows, purples and pinks dancing before us! We have taken our love for making pies and tarts and our love of carrots and done a mashup that hits all the right notes. Carrots, with their natural sweetness, can easily swing both savory and sweet, and this tart finds itself somewhere in the middle. The savory notes of the fresh thyme we put in the dough and sprinkle on the carrots, the creaminess of the ricotta and lemon, and the nuttiness of the pine nuts contrast with the carrots sweetness to find balance. You get a faint whiff of dessert, but you still feel like you are eating lunch! We have a host of other carrot recipes on the blog, like the eight-year olds favorite cake, and a zingy Carrot and Cumin Salad with Cilantro, so be sure to check those out as well. And, be sure to find the talented chefs, bloggers and bakers we have listed below online and peruse what they are making. You will never look at the carrot the same way again! This food community is a special one and we hope you will join. Rainbow Carrot and Ricotta Tart Makes one 9 inch square tart Serves 6-8 1/2 batch of your favorite pie dough, or store bought, enough for 1 disc Filling 6-8 oz ricotta 2 tablespoons milk or cream zest of 1 Meyer lemon 2 teaspoons Meyer lemon juice 1/2 teaspoon salt 24-30 baby rainbow carrots, peeled (or you could use about a dozen larger) 2 tablespoons olive oil 1 teaspoon salt 1/4 teaspoon pepper 2 teaspoons maple syrup 1 teaspoon fresh thyme 1 tablespoon toasted pine nuts and carrot top sprigs for garnish Preheat oven to 375 In a large steamer working in batches of the same color carrot, steam carrots whole until just tender, about 7 minutes depending on size. Remove and place in cold water to stop cooking. Slice carrots in half and toss carrots with Olive Oil, salt, pepper, maple syrup and thyme and set aside. Roll out your dough on a well-floured surface. Lay into a tart pan, making sure you get dough into the corners. Prick bottom with a fork a few times. Add pie weights or beans and blind bake the crust for about 20 minutes until it just starts to brown. Remove from oven. (If you don’t have a tart pan, use a shallow pie dish) Add filling ingredients in a small bowl. Mix well. After your shell has cooled to the touch, spread your filling and then arrange the carrots on top. We did a herringbone pattern but you can just lay on top careful not to overlap too much, filling in all the holes. Bake again for about 20 minutes until carrots have begun to caramelize, and crust is golden brown. Remove from oven, cool for 10 minutes and remove from tart shell. Sprinkle with pine nuts and some carrot top sprigs and serve. Here are all the wonderful collaborators! The Cooking of Joy’s Candied Carrot Rose Tart Figs and Flour's Thai Peanut Pizza Cocoa and Salt's Classic Carrot Cake Jojoromancer's Carrot Pie Julie Jones' Mum's Carrot Cake Lemon Thyme and Ginger's Sweet n' Spicy Herbed Carrots Better with Biscuits’ Carrot Souffle This Healthy Table’s Beet and Carrot Galette Always Eat Dessert’s Carrot Cake Squares with Orange Glaze What Annie’s Eating’s Roasted Carrots with Carrot Top/Herby Salsa Verde Fufu’s Kitchen’s Oven Baked Carrot Fries Drizzled with a Tahini Sauce Flours in Your Hair’s Carrot Pecan Cookies Hola Jalapeno’s Roasted Carrots with Chipotle Honey Butter A Worthy Pause's Paleo Thai Curry Carrot Soup Battered n Baked's Baked Carrot Cake Donuts Anna Jitlin's Carrot Muffins with Persimmon Topping Lemon Thyme and Ginger's Sweet and Spicy Herbed Carrots Something New for Dinner’s Minted Sous Vide Carrots with Balsamic Vinegar and Goat Cheese What Great Grandma Ate’s Paleo Carrot Mug Cake My Love at First Bite's Rezel Kealoha's Turkish Yoghurt Dip Cosettes Kitchen's Sumac Spiced Carrot and Feta Salad More Icing Than Cake's Spiced Quinoa & Roasted Carrot Salad Measuring Cups Optional's Carrot Curry Soup Hot Dishing It Out’s Carrot Whoopie Pies with Ginger Cream Cheese Frosting (vegan) Bee and the Baker's Glazed Carrot Rosette Tart with Honey Ginger Mascarpone Lady and Larder’s Carrot Crudite Board with Z'atar Hummus Khabakom's Katie Bird Bakes’ Carrot Cake Scones Jessie Sheehan Bakes' Chocolate Carrot Loaf Cake with Cinnamon Cream Cheese Whipped Cream Marianne Cooks’ Carrot and Zucchini Mini Muffins with a Cinnamon Frosting Baking the Good's Roasted Carrot and Herby Feta Galette Laurel Street Kitchen's Confetti Kitchen’s Harissa-Roasted Carrots with Lentils and Yogurt Prickly Fresh’s Carrot Cake Blondies with Cream Cheese Frosting Forty-nine Figs' Carrot Pie Loko Kitchen's Miso White Carrot Pie with Black Sesame Crust Gobble the Cook's Butter Loves Company’s Iced Carrot Cake Cookies Champagne and Cookies' Savory Carrot and Cauliflower Crumble with Za'atar and Herbed Feta Easy and Delish’s Carrot Spaghetti Suburban Pie and Treat’s Carrot Pineapple Raisin Pie Catgrammer's Triple Ginger Carrot Cake with Cream Cheese Frosting Hello Flour’s Macro-Friendly Carrot/Tomato Soup w/ Grilled Cheese Le Petit Eats’ Carrot Cake Breakfast Bars w/ Maple Coconut Icing Dukkah Queen's Carrots and Friends Salad (pickled, raw and roasted) Amanda Skrip's Rainbow Roasted Carrots with Citrus, Fennel and Arugala Flotte Lotte's Carrot Apple Pie Cook Til Delicious’ Mini Carrot Cake Smart in the Kitchen’s Curried Carrot Ginger Soup (Whole30) Candace Nelson of Pizanna’s Vegan Carrot Birthday Cake Farm and Coast Cookery's Carrot and Herbed Ricotta Phyllo Tart Pie Girl Bakes’ Five Spice Carrot Bundt Cakes with Bourbon Cream Cheese Glaze Zestfulkitchen's Moroccan Stuffed Portobellos Mom’s Kitchen Handbook’s Salad with Miso Ginger Carrot Dressing What’s Karen Cooking’s Spiced Cornbread w/ Carrots, Pecans & Chili Butter Diane Morrisey's Harissa and Maple Roasted Carrots and Lemon Rumbly in my Tumbly's Carrot Chai Pie Sweet Pillar Food’s Carrot and Date Salad with Tahini Vinaigrette Week Night Bite's Pies and Prejudice's Carrot Pie with Maple and Cardamon Feed The Swimmer's Air Fried Rainbow Carrot Chips with Tzatziki Plum Lucky Pie Pi's Roasted Carrot Pot Pie Smoothies and Sundaes’ Carrot Cake Sourdough Blossom to Stem's Caramelized Carrots with Fennel, Ricotta, and Walnuts Kate Aliberti's "Hop Scotch" Pie- Carrot Custard with Brown Sugar, Honey, Cinnamon and Scotch Annie Madison's Morning Glory Muffins The Dirty Whisk's Carrot and Herbed Ricotta Tart Jill Salama's Carrot Latkes with Cranberry Aioli (Paleo) Food By Mars' Paleo Carrot Walnut Loaf Cake The Olive and Mango's Carrot Cake Roll Easy Gourmet Living's A Modest Feast's Pomegranate-Molasses-Glazed Carrots With Crispy Chickpeas and Feta Seed and Mills' Carrot Cake with Tahini Caramel Frosting Its a Vegworld Afterall's Zesty Carrot Spirals |
A square meal is satisfying, nourishing, complete.
A round table includes all. Categories
All
|


 RSS Feed