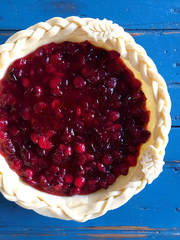
 Hurray, it's fall! Pumpkin lattes, leaves, frigid temperatures! Well, sort of hurray, we are definitely not used to the cold weather, but we certainly love the foliage we are getting in Idaho, and that we are starting to slide into all our favorite holidays. But, before we get to turkey and stuffing and latkes and gingerbread houses and rows of cookies, we are exited to helm our 7th, yes 7th, ingredient based instragram collaboration with Annie of What Annie's Eating! This seasonal celebration of ingredients has been our favorite way to connect with all the like-minded creative foodies we have found on instagram. We are constantly blown away by everyone's passion for food and community, and in all honesty, this is the community that has offered us respite in these crazy times and we are so grateful. For this season, we have looked to the humble cranberry to offer up inspiration. For us, we really don't use it all that often except for our thanksgiving side dish, and dried for our granola or cookies over the rest of the year. However, cranberries are truly a special berry, packed with antioxidants and vitamin c. Their tart punch can lend themselves to both sweet and savory dishes, as their sweet and sour vibe can accompany meat or star in their own dessert as we have done here. Yes, they do need more than the usual amount of sugar to really bring out their charm, but, this pie is worth the extra! If you are someone who loves sour cherry pie, this is your winter pie. The streusel and oats give the pie an oatmeal cookie vibe, and the cranberries cook down with the orange and ginger to give you this delicious jammy filling. Be sure to check out our hashtag, #yesyoucranberry for everyone's amazing cranberry dishes and show us what you are making as well! Cranberry Orange Streusel Pie 9” inch pie 1 Disc of Your Favorite Pie dough (can make from scratch or use a store bought) Filling: 4 cups fresh cranberries 1 1/2 cup sugar zest of 1/2 orange juice of ½ orange pinch of salt 1 tablespoon of tapioca flour ½ tsp. ground ginger Oatmeal Streusel Topping: 4 tablespoons unsalted butter, softened 1 cup of oatmeal 1 tablespoon of flour 1 tsp. cinnamon ¼ cup brown sugar 1 pinch salt 1 egg, beaten. 1 tsp. sparkling sugar To make streusel, place all ingredients into the food processor. Pulse until crumbly and beginning to hold together, then set aside. Place all filling ingredients into a saucepan, cook for about 7-8 minutes until berries begin to burst, and the sugar and tapioca flour have dissolved. Set aside to cool. Preheat oven to 400. Roll our dough and line a 9-inch pie tin, trim edges and crimp. Add cooled filling and top with crumble letting a few berries peek through. You can use your extra dough to make some designs and place on top of crumble or along the edges. Brush with beaten egg and sprinkle with sparkling sugar. Bake pie for 10 minutes, then continue baking at 375 until evenly browned and berries are bubbling. Cover with tinfoil if the top gets too dark before the filling is bubbling. You really are just looking to insure your crust is baked as the filling has already been cooked. Cool before slicing and serve with sweetened whipped cream or ice cream! Check out these recipes from our friends! What Annie’s Eating Cranberry Mojitos Easy and Delish -- Avocado Cranberry Hummus Dip Flottelottehaan Buchteln with Cranberry Oranges Jam The Cooking of Joy’s Cranberry Curd Tart Jessie Sheehan Bakes - Cranberry Buckle Ciao Chow Bambina - Cranberry Pecan Cracker Spread Baking The Goods - Cranberry Apple Brown Butter Crumble Pie Katiebird Bakes - Cranberry Sauce Breakfast Rolls Crumb Top Baking’s Cranberry Orange Overnight Oatmeal Muffins
5 Comments
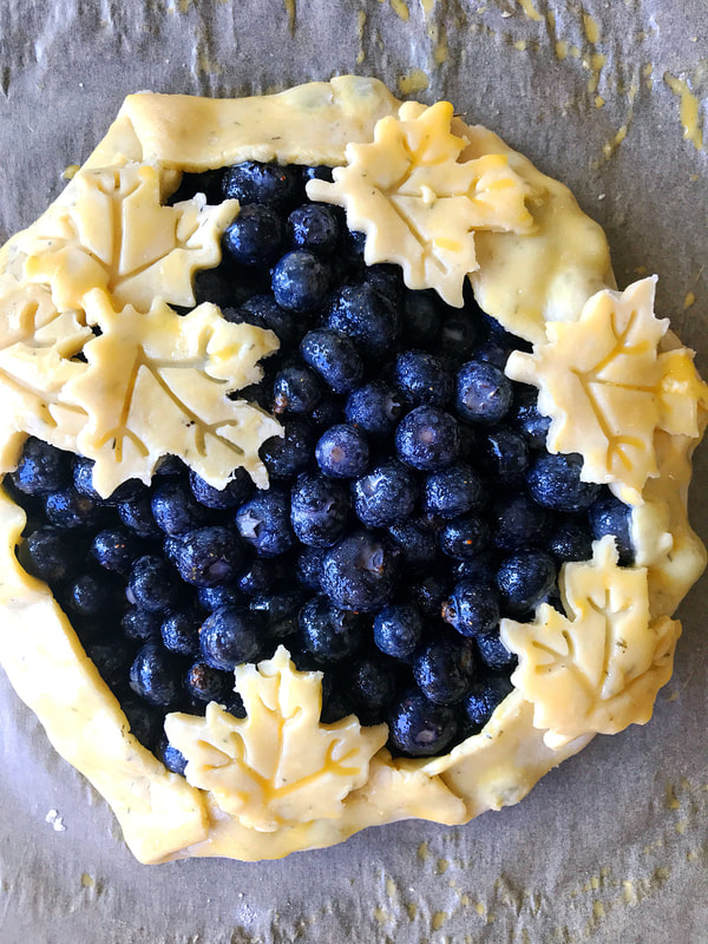
The galette is our go-to gal. She is relatively easy to put together, and is always a crowd pleaser. Once you get in the habit of making dough, if you double up each time you make it, you can have discs waiting for you in the freezer. This makes it very simple to see what fruit you have on hand, pull a dough out the night before and place in the fridge (or pull out just a few hours and let rest at room temperature) and whip up a treat. While we often use a mixture of whatever fruit seems like it is just past its prime, sometimes we want the the singular pop of blueberry. Combining this super fruit with lemon and ginger gives you a dessert worthy of any potluck. The flavors of the spice and lemon enhance the sweet tart tang of the berry and if you dollop on a big scoop of ice cream, you have a little bit of heaven.
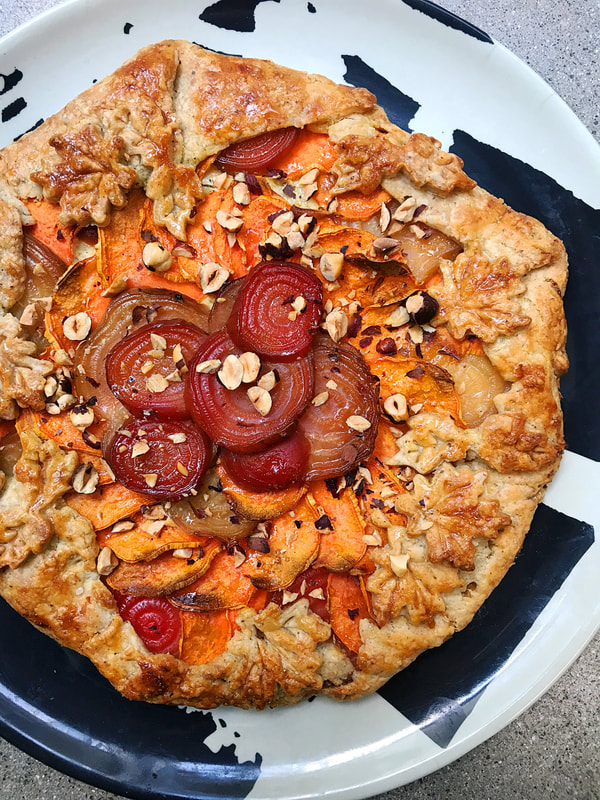
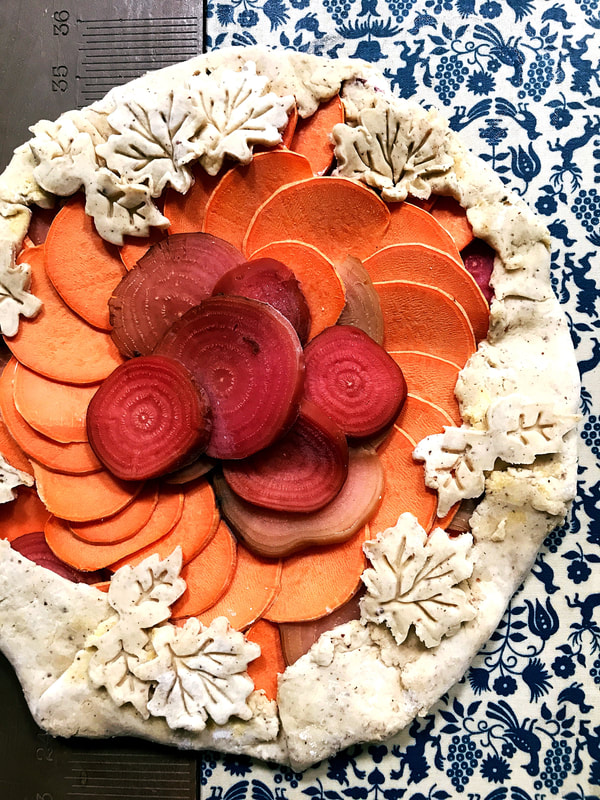
Lemon Blueberry and Ginger Galette Makes one Galette that serves about 6-8 ½ Batch Any Basic Pie Dough, or store bought. Enough for 1 disc of dough. 2-3 cups blueberries 1/2 lemon, juiced and zested ½ c sugar 3 tablespoons tapioca flour, cornstarch or flour ½ teaspoon ginger ½ teaspoon vanilla extract 1 egg, beaten Sugar for sprinkling Preheat oven to 375 Add tapioca flour, lemon juice, vanilla extract, lemon zest, sugar, and ginger to a bowl. Mix then add the berries. Carefully mix fruit, but mix well so juices begin being released. Mix until tapioca flour is almost dissolved then set aside. Roll out your dough on a well-floured surface. Trim sides to get as close to a circle as you can then save the scraps. Move dough onto a parchment lined baking tray preferably without a lip. Place fruit in middle of the dough and spread out, leaving about a two-inch rim around the sides. Brush with egg wash and start at twelve o’clock, folding the dough in. Work your way around the tart and use the egg wash to seal your folds. You will get about 6-8 folds resembling an octagon or hexagon. You can stop here and brush with egg wash, then sprinkle with sugar. Or, reroll scraps and have some fun with cookie cutters, using the egg wash to help stick your shapes to the tart. When done decorating, brush with egg wash and sprinkle with sugar. Bake for 40-50 minutes until fruit is bubbling and dough is brown. If it browns too quickly cover with foil and keep baking. *You can also freeze before baking and then bake when you choose. It will take about 20 more minutes. Sometimes the best ideas and recipes come from tinkering with ingredients you have in the fridge or pantry. Sort of like playing your own version of Chopped, you are forced to reimagine and create. This ridiculously good galette was the product of just that mind set. We had roasted some beets earlier in the week and forgotten to eat them, had a sad bag of a few hazelnuts sitting around, and a sweet potato that never made its way into roasted sweet potato fries. We had been wanting to experiment with adding nuts to our pie dough, so figured why not try the hazelnuts, as they always pair well with the earthy sweetness of beets. We randomly had some Boursin and cream cheese, so bam, this galette was born! Having made a galette a few weeks ago with raw beets, the roasted ones proved to be a better idea, and by slicing the sweet potatoes super thin on a mandolin, they also had time to bake and get all creamy. Hitting the sweet, the savory, garlicky, creamy, and crunchy notes, our guests inhaled this tart, coming back for seconds and thirds!
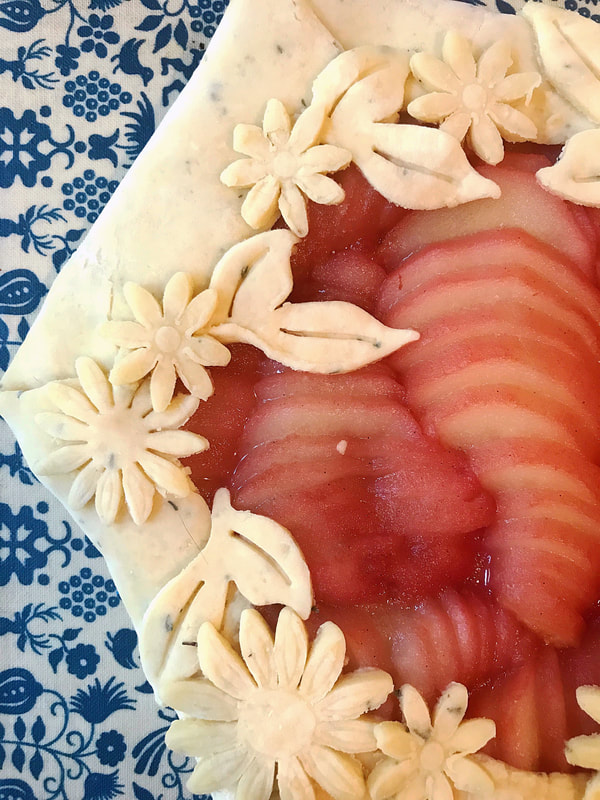
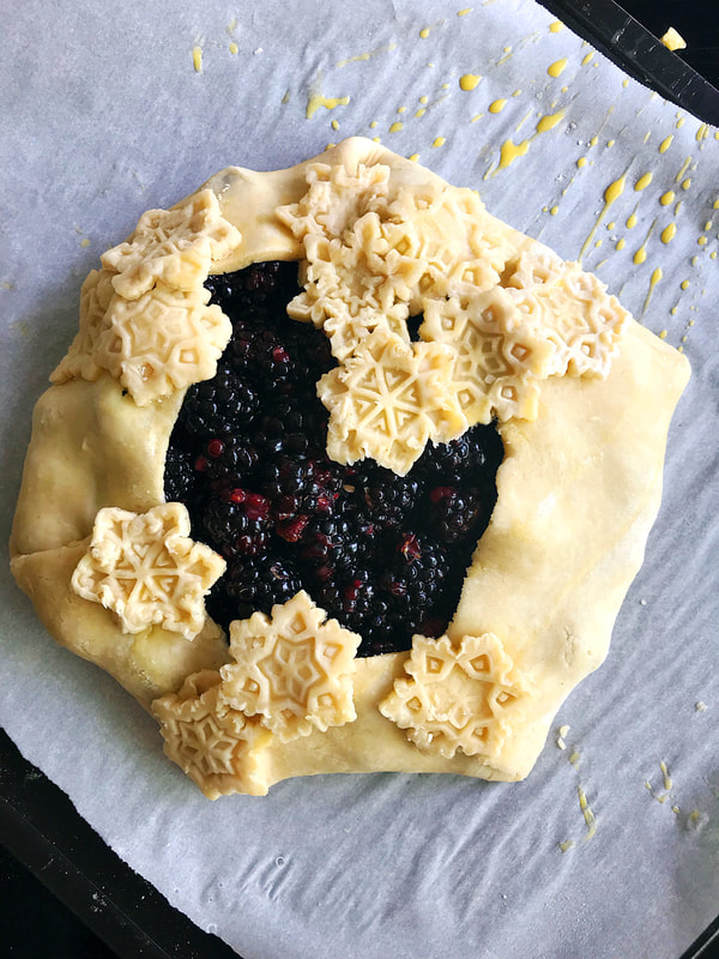
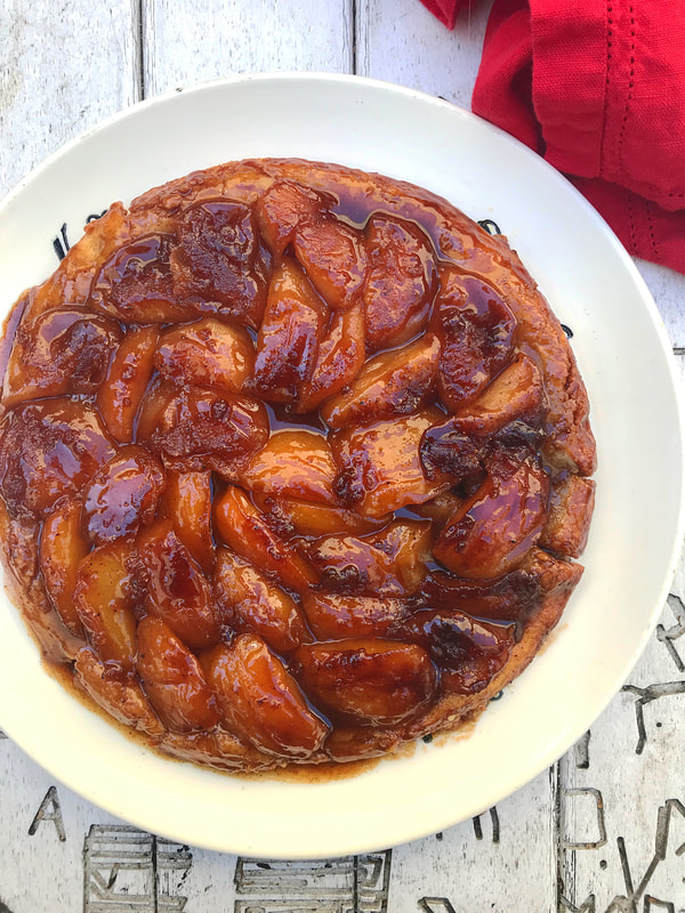
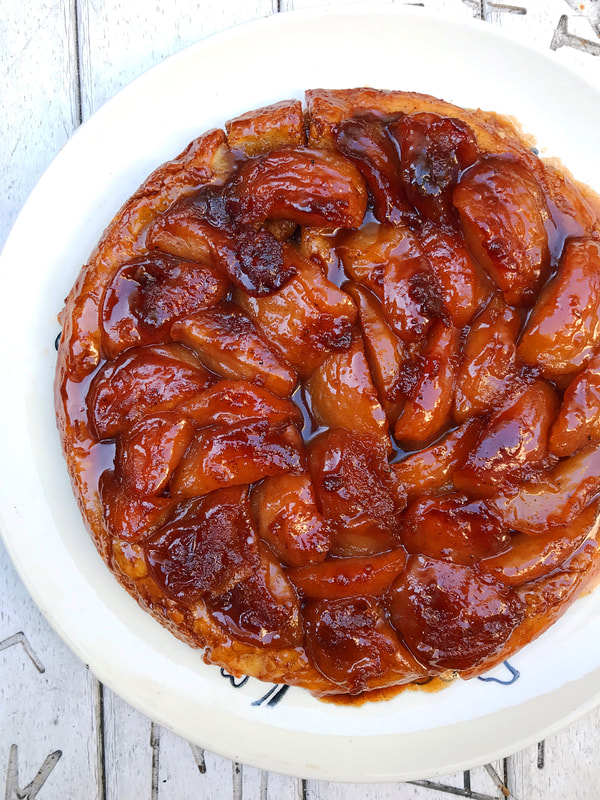
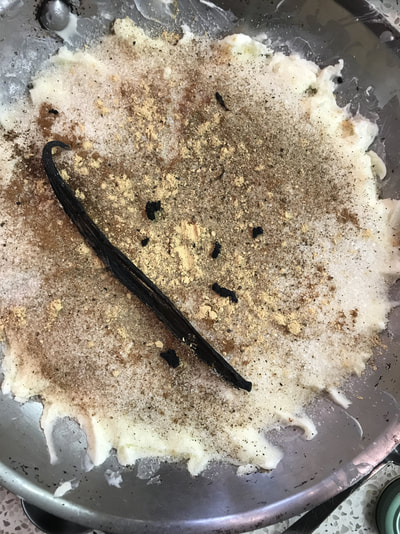
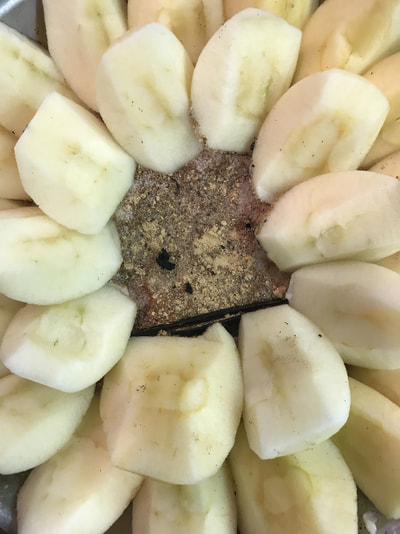
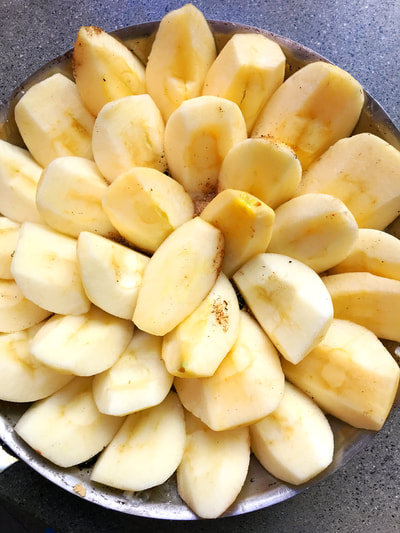
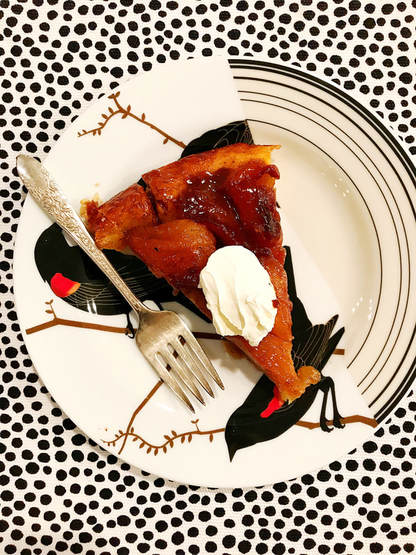
Beet, Sweet Potato and Hazelnut Galette Makes one Galette that serves about 6 ½ Batch Hazelnut Pie Dough 2-3 beets, roasted and thinly sliced 1/2 large sweet potato, thinly sliced on mandolin 1 package garlic and herb Boursin cheese ½ c cream cheese 1 tablespoon of olive oil ¼ cup hazelnuts, roasted and roughly chopped 1-tablespoon honey 1 egg, whisked Dough (Makes 2 9 inch shells) 1 cup chilled butter 4 tablespoons vegetable shortening 2 cups all-purpose flour ½ cup hazelnuts 1-teaspoon salt 1-tablespoon sugar 7 tablespoons ice water 2 teaspoons apple cider vinegar Dough- Put nuts into the food processor. Pulse until nuts are ground. Add butter, shortening, flour, sugar and salt into food processor. Pulse until you have small pea sized pieces. Add apple cider vinegar and chilled water to the flour mixture and pulse until dough just comes together. Flip dough onto floured surface and push into a ball. Divide into two, and gently flatten each half into a disc. Wrap in plastic and let rest in fridge or freezer until ready to use. If freezing the dough, put in fridge the night before you want to make the tart. *You can also make the dough by hand. Add ALL the dry ingredients to a bowl. Cut butter into smaller pieces and add the butter and shortening to the flour. Cut with a pastry cutter or two forks until you have pea-sized pieces and mixture looks sandy. Add all your liquids and stir until dough just comes together, then turn out onto plastic and push into ball. Divide in two and follow above. *To roast beets, wrap in tin foil, creating a little packet, and roast at 400 degrees until easily pierced with a knife. Preheat oven to 375 Mix the cheeses together and set aside. Roll out one disc of dough on a well-floured surface. Trim sides to get as close to a circle as you can then save the scraps. Move dough onto a parchment lined baking tray preferably without a lip. Place cheese in center and spread out, leaving about an-inch rim around the sides. Alternating rings of beets and sweet potatoes, starting at the edge, leaving an inch, circle your vegetables, layering them slightly on top of each other until you have used them all. Drizzle with olive oil. Brush with egg wash and start at twelve o’clock, folding the dough in. Work your way around the tart and use the egg wash to seal your folds. You will get about 6-8 folds resembling an octagon or hexagon. You can stop here and brush with egg wash. Or, reroll scraps and have some fun with cookie cutters, using the egg wash to help stick your shapes to the tart. When done decorating, brush with egg wash. Bake for 40-50 minutes until veggies are slightly browning and dough is brown. If it browns too quickly cover with foil and keep baking. Remove from oven and drizzle with honey and sprinkle the hazelnuts. Serve! *You can also freeze before baking and then bake when you choose. It will take about 20 more minutes. This lovely little tart was inspired by a collaboration with Muddy Boot Wines. We were charged with showcasing their tasty Rose and we decided to bake with it. Pear and rose seemed like a wonderful combination, and poaching the pears in the wine proved a delicious idea. By adding the cinnamon, ginger and vanilla to the wine, the sweetness of the pears was enhanced. The thyme in the crust added another herbal element that made the tart feel like the best pieces of a cheese plate thrown together. Rose Poached Pear Tart Makes 1 tart serves about 6 1/2 batch of your favorite pie dough, or store bought. Enough for one disc. 1 bottle rose wine ½ cup sugar 1 ½ inch piece of ginger, peeled ½ of a lemon’s peel 1 vanilla bean 2 cinnamon sticks 5 ripe pears, peeled and cored 1/2 tsp fresh thyme, minced. Preheat oven to 375 Take your vanilla bean and cut in half the long way, then scrape, adding both the bean and scrapings to a wide sauce pan. Add wine, sugar, lemon zest, ginger and cinnamon stick. Bring to a boil over high heat, stirring just until sugar has dissolved. Reduce heat to medium and simmer for 3 minutes to blend flavors. Gently place pears into poaching liquid. You may need to cover with parchment or a towel to insure the pears are submerged. Simmer until pears are tender when pierced with a knife, 15 to 25 minutes, depending on ripeness. Use a slotted spoon to transfer pears to a large bowl. Bring poaching liquid to a boil until liquid has reduced and thickened slightly, 20 to 25 minutes. Strain and reserve. Roll out half, one disc, of your dough on a well-floured surface. Trim sides to get as close to a circle as you can then save the scraps. Move dough onto a parchment lined baking tray preferably without a lip. Sprinkle with minced time. Slice pears about 1/8 inch thick and try to keep in their halved shapes, then slightly fan them out. Place fruit in middle of the dough, on top of the thyme, fanning the pears as you go, leaving about a two-inch rim around the sides. Brush with egg wash and start at twelve o’clock, folding the dough in. Work your way around the tart and use the egg wash to seal your folds. You will get about 6-8 folds resembling an octagon or hexagon. You can stop here and brush with egg wash, then sprinkle with sugar. Or, reroll scraps and have some fun with cookie cutters, using the egg wash to help stick your shapes to the tart. When done decorating, brush with egg wash and sprinkle dough with sugar. Brush pears with reserved liquid. Bake for 40-50 minutes until fruit is bubbling and dough is brown. If it browns too quickly cover with foil and keep baking. We love galettes for many reasons. One, they are an easy way to use up whatever fruit you have that is on the verge, and two, once you have mastered pie dough, they are quicker than a whole pie to pull together and serve. It was actually a galette, or rustic tart, that was one of our first signature desserts. We would make them every year for July 4th with a cooked fruit compote, peach, nectarine, cherry, and nary a piece was left at the end of the party! (You can find the recipe in our archives under pies and rustic fruit tarts) Over time, they became less rustic and more designed, but the basic vibe is the same. Great crust, plus sweet tangy fruit equals dessert heaven. ,This version simplifies the process, and can be made and served in about an hour, quicker if you have the dough already made. The combination of blackberries and lemon gives you that sweet tart taste you crave with pie. Be sure to taste your berries and adjust the sugar you add to their acidity. If you don't have blackberries, use whatever fruit you have on hand! Blackberry Galette Makes one Galette that serves about 8 ½ Batch your favorite pie dough or store bought, enough for one disc 2-3 cups blackberries 1 lemon, juiced and zested 1/3 to ½ c sugar depending on the sweetness of your berry 3 tablespoons cornstarch ½ teaspoon ginger, nutmeg, or cinnamon ½ teaspoon vanilla extract 1 egg, beaten Sugar for sprinkling Preheat oven to 375 Add cornstarch, lemon juice, vanilla extract, lemon zest, sugar, and spice to a bowl. Mix then add the berries. Carefully mix fruit, but mix well so juices begin being released. Mix until cornstarch is almost dissolved then set aside. Roll out one disc of dough on a well-floured surface. Trim sides to get as close to a circle as you can then save the scraps. Move dough onto a parchment lined baking tray preferably without a lip. Place fruit in middle of the dough and spread out, leaving about a two-inch rim around the sides. Brush with egg wash and start at twelve o’clock, folding the dough in. Work your way around the tart and use the egg wash to seal your folds. You will get about 6-8 folds resembling an octagon or hexagon. You can stop here and brush with egg wash, then sprinkle with sugar. Or, reroll scraps and have some fun with cookie cutters, using the egg wash to help stick your shapes to the tart. When done decorating, brush with egg wash and sprinkle with sugar. Bake for 40-50 minutes until fruit is bubbling and dough is brown. If it browns too quickly cover with foil and keep baking. *You can also freeze before baking and then bake when you choose. It will take about 20 more minutes. This galette was also featured in a cool article in CBC LIFE about the pies of instagram! Check out all the inspiration! Hurray, it's fall and nothing quite says fall like a tart, juicy, sweet apple! We had so much fun seeing what all of the creatives chefs and bloggers came up with this past summer with #summerlovespeaches and spring/s #easypeasyforspring that we couldn't help but organize another ingredient based collaboration, this time focused on this classic fruit! The community of passionate food lovers created by social media is inspiring, warm, and friendly and connecting through food has been a respite in these chaotic times. We, along with @whatannieseating, welcome some new faces this time around like @hazelzakariya, @sweetpillarfoods, and @saltnpepperhere and are happy to have folks like @katie_Clova, @feedtheswimmers, @bakingthegoods, @jojoromancer and @cloudykitchen return to showcase what they love making with apples. Whether savory or sweet, the apple is an all purpose workhorse. Muffins to pies, chutneys to candy, soups to nuts so they say, the apple can do it all. And, with so many new or revived varieties out there, there is certainly one for every palette. We still have our eye out for those gorgeous instagramable pink pearl apples, and are eating our fill of honey crisps! Our entry into this collaboration is a riff on Mom's favorite dessert and one of the first things we learned how to make in cooking school. The classic Tarte Tatin. Butter, sugar, apples combine to create magic unlike any other. We put a little spin on it by adding in chai spices, as the warming notes of cardamon, ginger, cloves, cinnamon and black pepper marry with all that caramel goodness. Most everything happens in one pan so don't let the caramel scare you off. It's well worth it! And, be sure to check out #aisforalltheapples for everyone's tasty creations! We also will list everyones blogs or instagram accounts on the bottom of the post, so scroll down and click away, they are recipes to try and taste! P.S. This dessert was gobbled up instantaneously by all generations! Chai Spiced Tarte Tatin makes 1 10 inch tart 7-8 of your favorite baking apples, peeled, cored, and quartered 3/4 cup of room temperature butter 1/2 teaspoon cinnamon 1/4 teaspoon ground cloves ½ teaspoon ground ginger ¼ teaspoon cardamom A few twists of freshly cracked pepper ½ cup sugar 1 whole vanilla bean 1 batch Sweet, short pastry In a 10-inch sauté pan, press your room temperature butter into an even layer that covers the entire bottom of the pan. It should be about 1/8- ¼ inch thick and you should not see any of the bottom of the pan. Sprinkle your sugar all over the butter in an even layer then do the same with all of your spices. Split the vanilla bean and scrape all seeds onto the sugar. Also, place the whole bean in. To arrange the apples, start on the outside of the ring and with the curved side of the apple facing out, place apples slightly overlapping in rings working your way until you get to the center. You can push them gently into the butter to help then stay. Over medium heat cook the apples and sugar. This will take about thirty minutes. Keep rotating the pan and gently pressing the apples down as they cook. You want the apples to soften and the sugar to turn a brown caramel. Adjust your heat if the caramel is cooking too quickly. You will know you are done when the apples are soft and caramel is less liquid and stickier. Remove from heat and let cool. *You can stop here and this, once cool can be kept in fridge for up to 2 days. Preheat oven to 375 Roll out your dough on a floured surface to about ¼ inch thick and then lay over the apples. Fold over edges so they sit within the pan. If you are doing this right after you cook apples, be careful! Bake for about 30 minutes until dough is brown. Remove from oven and let sit for 5 minutes. Here, be very careful, as you need to invert the tart before it cools or apples will stick to the pan. With a large, platter with a small lip, invert tart and rearrange any apples that have stuck to pan or dislodged. Remove the vanilla bean and serve with a big dollop of Crème Fraiche! Be sure to head over the #allisforalltheapples for some serious apple inspiration and also to these links below! @cloudykitchen- Salted Caramel and Apple Babka @Katie_Clova- Maple Apple Cake @suburbanpiesandtreats- Rosemary Brown Butter Apple Pie @especiallysouthern- Apple Pie Egg Rolls @pensive_foodie- Bacon Crusted Apple Pies @mykitchenlove- Bird's Nest Apple Caramel Cake @pinch_dash_glug- Waldorf Salad's Twisted Sister @joyosity- Deep Fried Apple Dumplings with Miso Caramel Dipping Sauce @saltnpepperhere- Honey Apple Muffins @inspiredbytheseasons- Brussels Sprout & Apple Slaw @vanillaandbean- Spiced Apple Pecan Rum Bread @dukkah_queen- Caramelized Venetian Bread Pudding @weeknightbite- Apple Pie Chia Pudding @catgrammer- Spiced Apple Cake with Bourbon Toffee Sauce @playswellwithbutter @amodestfeast- @easygourmetliving @moreicingthencake- Apple Butter Pretzels with Rosemary Cheddar Dip @feedtheswimmers- Apple Buckwheat Galette with Halva and Maple Tahini @thekitchensinkblog- Apple Cheddar Loaf @christine.chitnis @whatshouldimakefor- Hasselback Apple Puff Pastry Tarts @thisdeliciouslife- @amandaskrip @jessiesheehanbakes- Apple Fritters @farmandcoastcookery- Apple Cider Donut and Cinnamon Apple French Toast Casserole @smartinthekitchen- Gluten Free Apple Cranberry Crisp @helloflour- @ful.filled- Milopita- Greek Apple Cake @thishealthytable- Cardamon Apple Tart @thegalettegirl- Apple Galette @piegirlbakes- Apple Pie @figsandflour- Apple Purple Potato Pizza @somethingnewfordinner- Savory Bread Pudding with Apples, Sausage and Pecans @alyssagagarin @champagneandcookies- Apple Galette @alwayseatdessert- Apple Spice Scones with Maple Bourbon Glaze @rezelkealoha- Apple Poached Rose with Rosewater Reduction @thesoupsolution- Fennel Sausage and Apple Dressing (stuffing) @lemonthymeandginger- Smoky Maple Apple Dutch Baby @worthypause- Thanksgiving in your Mouth Paleo Stuffing @anniecampbell- Popcorn, Cheese and Apples @blossomtostem @cocoaandsalt- Vegan Apple Stuffin' Muffins @ladyandlarder- Cheeseboard with Apples @chefdanielagerson- Skillet Caramel Apple Pie @gobblethecook- One Pan Pork and Sausages with Apples @allomamanwhatscooking- Apple & Camembert Tarte Tatin @lindarcampos @holajalapeno- Fluffy Apple Chili Biscuits @friendswhofete- Pomegranate Ginger Apple Cider Punch @seedandmill @bakingthegoods- Apple Cheddar and Thyme Scones @whatannieseating- Butternut Squash and Apple Soup with Asiago & Sage Croutons @lifeisbutadish @its_a_vegworld_afterall-Individual Microwave Apple Crisp @myloveatfirstbite @floursinyourhair- Brown Butter Bourbon Apple Pie @cooksandkid- Apple Cabbage Jalapeno Slaw @confettikitchen- Fall Kale Salad with Chicken and Apples @saltedplains- Gluten-Free Apple Crumb Cake @marypardoux- White Bean and Apple Soup @plumluckypiepi- Pinot and Cranberry-poached Apple Slab Pie @easyanddelish- Candy Corn Apple Pops @motherfoodie- @thismessisours- Easy Baked Apple Custard @hazelzakariya- Apple Pie Smoothie @butterlovescompany- Gingerbread with Brandied Apples @measuring.cups.optional- Caramel Apple Upside Down Cake @thewholeelchilada @flottelottehaan- Apple Bread with Cinnamon Butter @thegoodcooker @korekitchen- Green Apple Pie Smoothie @zestfulkitchen- Puffed Apple Pancake @sweetpillarfood- Apple Honey Brie @khabakom @farmgirlsdabble- Peanut Butter Apple Cookies @sweetisthespice- Maple, Walnut, Apple Cider Israeli Couscous @ameecooks- Peanut Butter Protein Dip with Apples @Whatskarencooking-Country Apple Bundt Cake with Cardamon Apple Compote @bakingbandits- Apple Galettes with Hazelnut Frangipane and Brown Butter @nyuberry- Moist Jewish Apple Pie TESTING
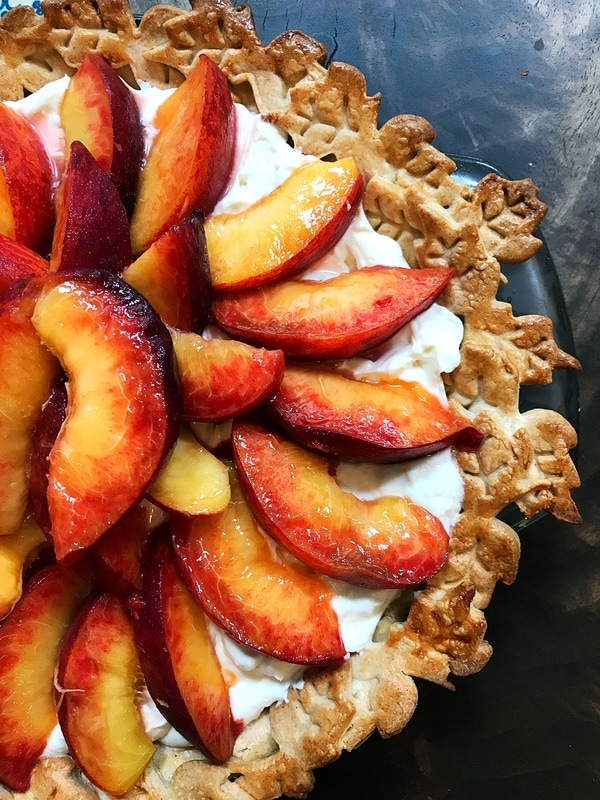
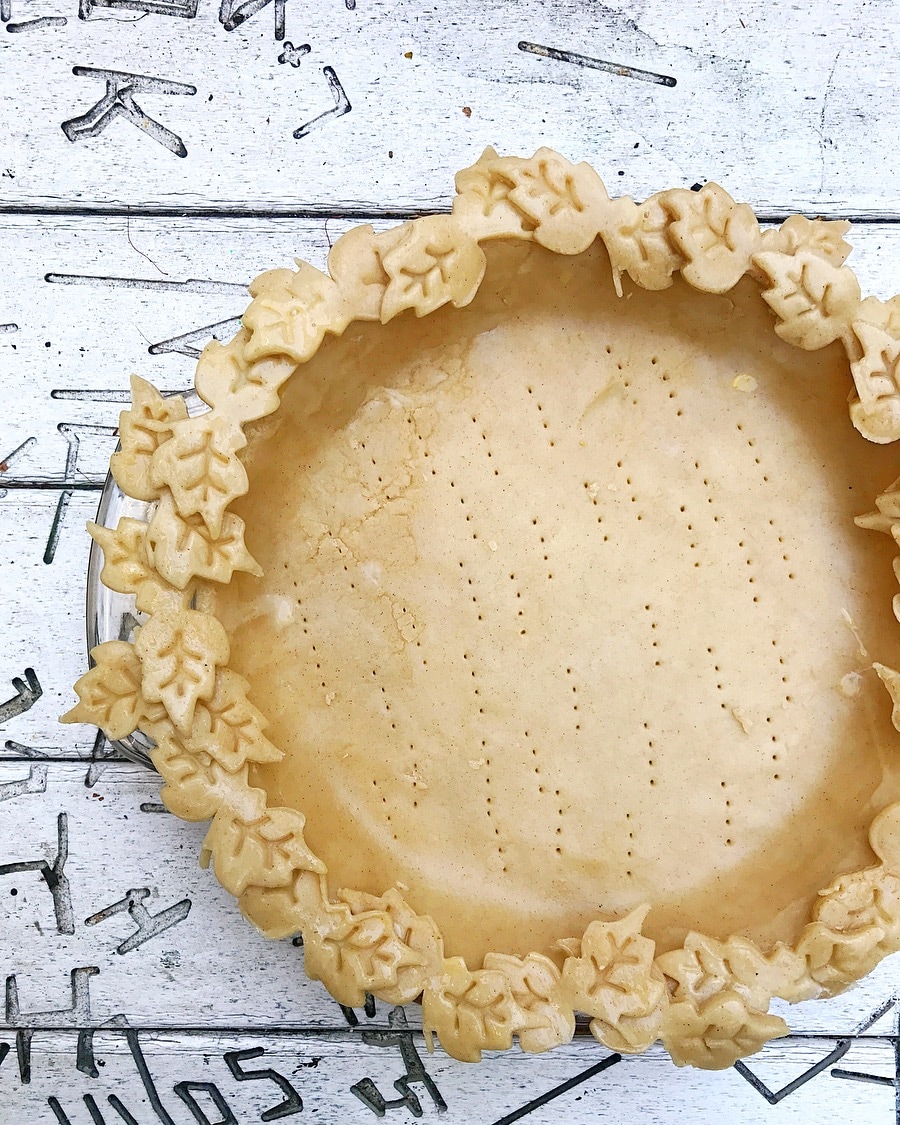
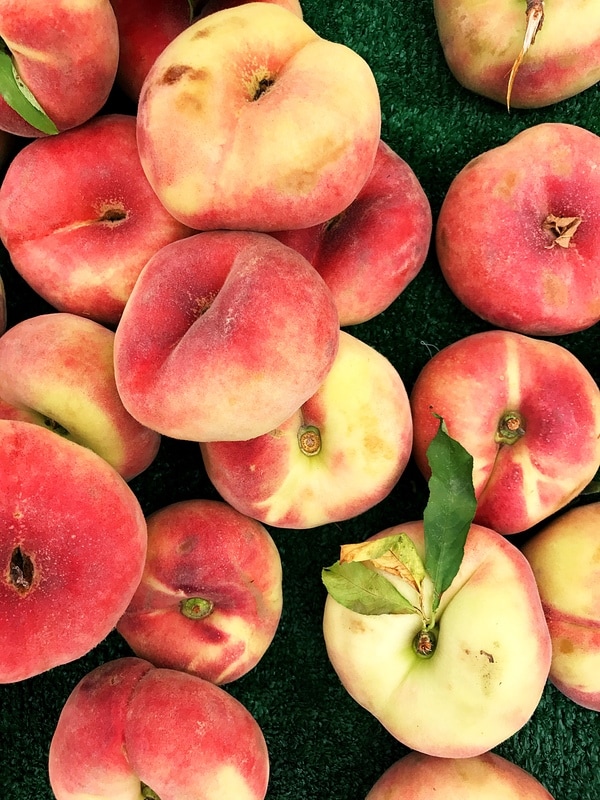
Summer is upon us and the farmers markets are bursting with stone fruit! One of our favorites is peaches as this versitile fruit with its juicy, tangy, sweetness can enhance both savory and sweet dishes. From pies to BBQ sauces, galettes to burrata salads, peaches make everything shine with the sweetness of the season. That was the reason we and Whatannieseating decided to organize another seasonal collaboration, #summerlovespeaches! This time we extended our reach to bakers and savory chefs alike, challenging all these talents to break out their favorite peach recipes! These inspiring instagrammers and bloggers like jojoromancer, pamelasalzman, cloudykitchen, julie_jonesuk, and bakingthegoods have come up with some amazingly creative and delicious recipes highlighting the peach, so be sure to check out their blogs and instagram accounts we've listed below. Our recipe was inspired by trips back East to visit family and a little farm stand, Briermere Farms. Their pies, baked goods, and general offerings are amazing, and their cream pies are a family favorite. They don't ship, nor give any hints about their famous recipes, and seeing that we are on the West Coast, we were forced to come up with a way to emulate and pay homage from afar. After a few tasty trial and errors, we came up with a pie which comes as close to the original as we could while still giving it our own spin. Make it and tell us how we measure up! Its creamy, sweet, sour, tangy, and luscious, everything you want in a pie and more! Fresh Peach Cream Pie with Cinnamon Cream Cheese Crust Makes one pie For Dough: (This makes enough for 2 pies) 1 cup chilled butter 4 tablespoons cream cheese 2 1/2 cups all purpose flour 1 teaspoon of salt 1 tsp. cinnamon 6 tablespoons water with ice cubes 2 teaspoons vanilla 2 teaspoons apple cider vinegar 1 egg, beaten Filling: 8 oz. package of cream cheese, softened ½ cup confectioner’s sugar ½ teaspoon vanilla extract ½ teaspoon almond extract 1 ¼ cup heavy cream 3 peaches, sliced Juice of ½ lemon 1 tablespoon of sugar For Dough: Put butter, cream cheese, 2 cups of flour, cinnamon, and salt into food processor. Pulse until you have small pea sized pieces. Add the rest of the flour and virally pulse. Pour mixture into a bowl and add vanilla, and apple cider vinegar. Add chilled water to the flour mixture and fold with a large flat spatula until dough comes together, pressing dough as you fold. Flip dough onto floured surface and push into a ball. Divide into two, and gently flatten each half into a disc. Wrap in plastic and let rest in fridge or freezer until ready to use. If freezing the dough, put in fridge the night before you want to make the tart. Preheat oven to 375 Roll out one disc of dough and place into pie dish, crimping or decorating edges, as you like. Brush with beaten egg, poke the bottom all over with a fork, and weigh down middle with pie weights, or beans. Bake until edges begin to brown, about 20-30 minutes, then remove beans and put back into oven until bottom begins to brown. Remove and cool. Cream together the softened cream cheese, confectioner’s sugar, and extracts. In a separate bowl, whip the heavy cream until it holds soft peaks. Fold the whipped cream into the cream cheese mixture. Spoon the mixture into the cooled piecrust. Refrigerate for at least an hour and ideally several hours. Mix sugar and lemon juice in a small bowl, add peaches and stir carefully. Then, layer peaches in circles onto the filled pie. Check out these creative chefs bringing their passion for food to their blogs and instagram accounts!
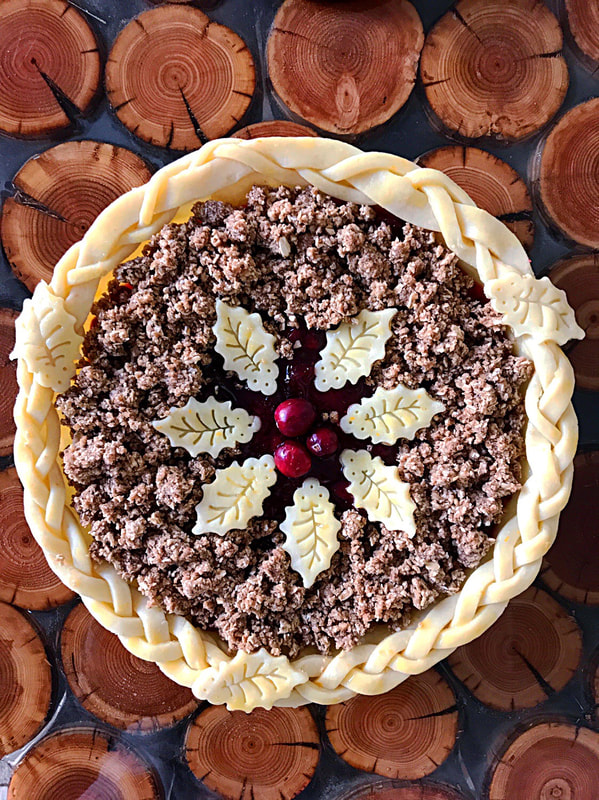
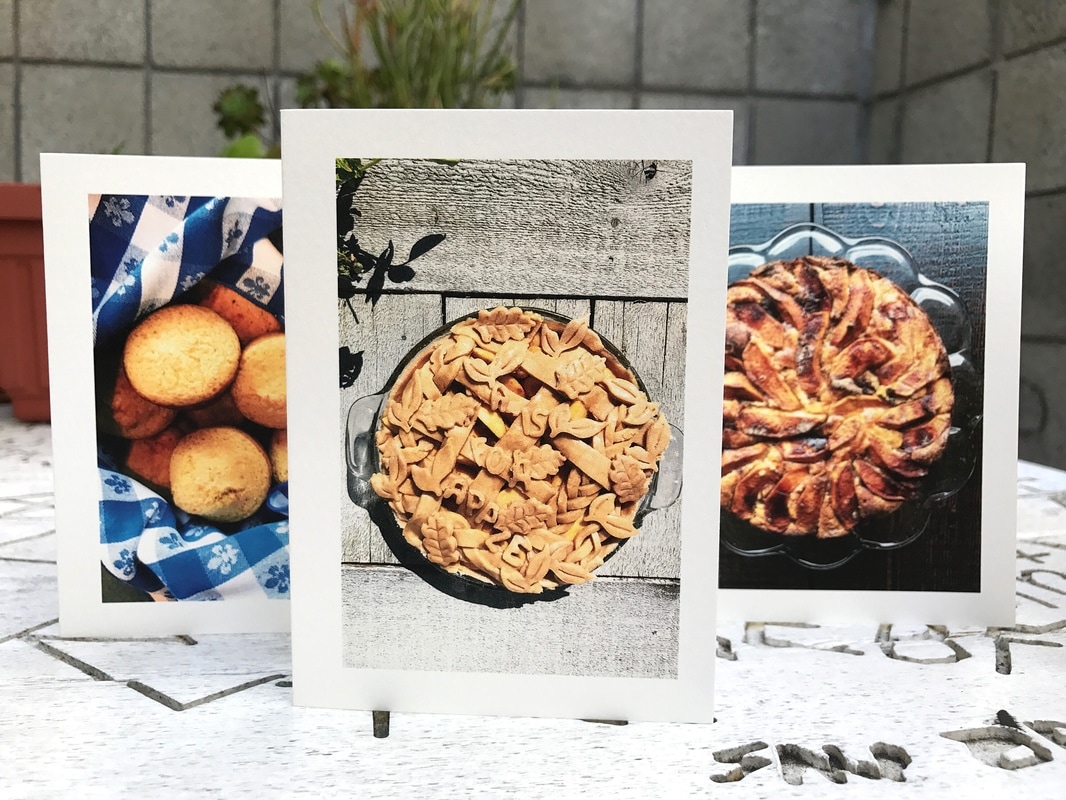
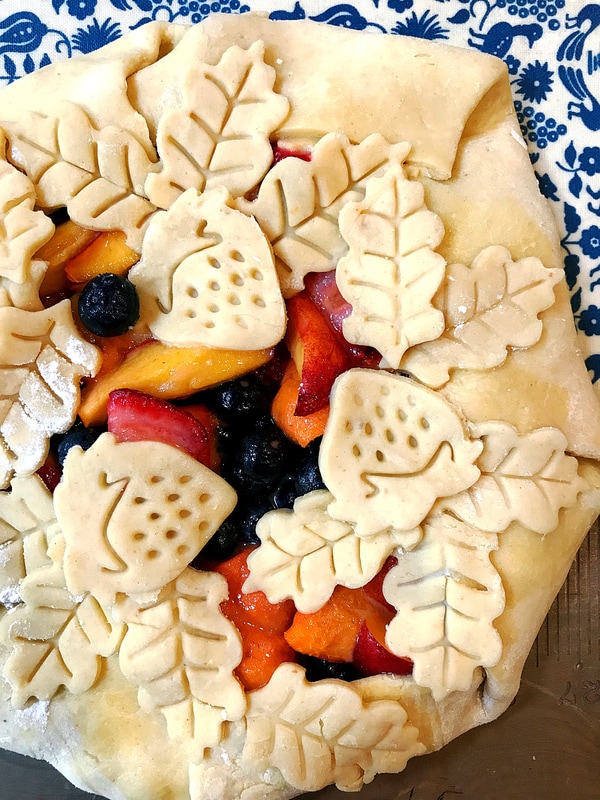
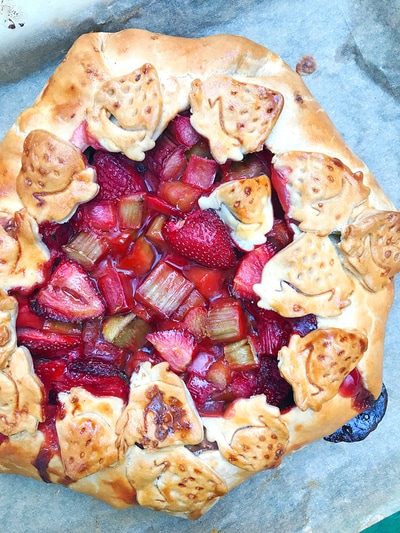
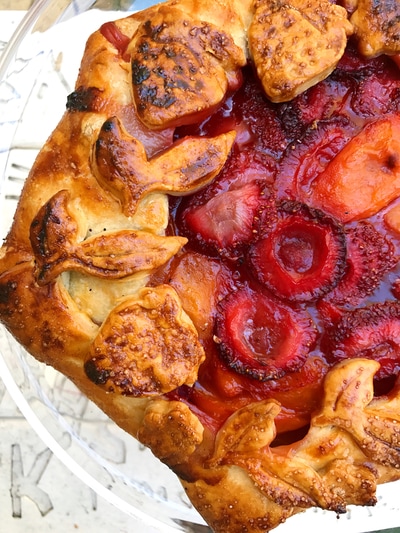
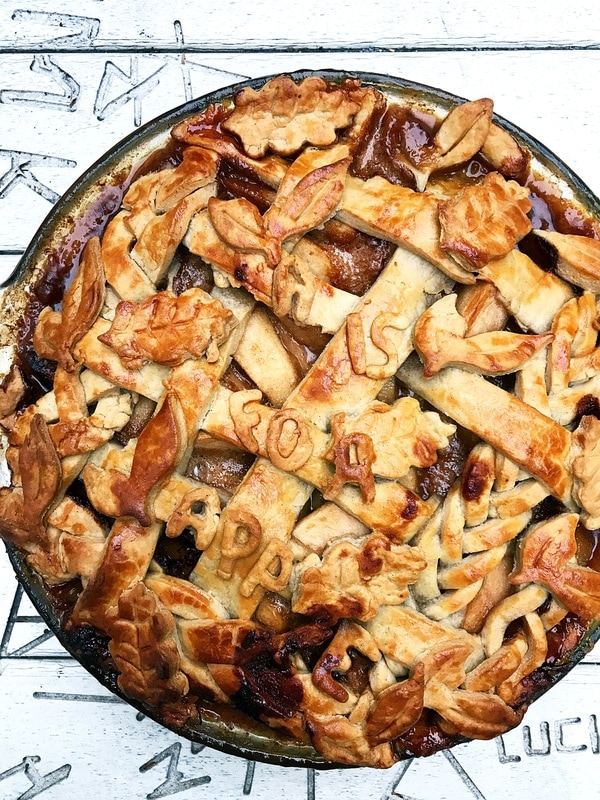
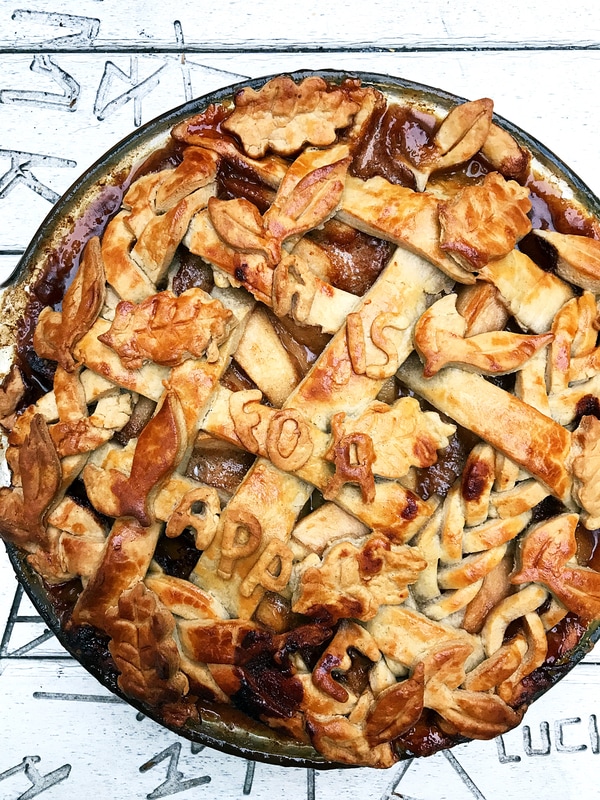
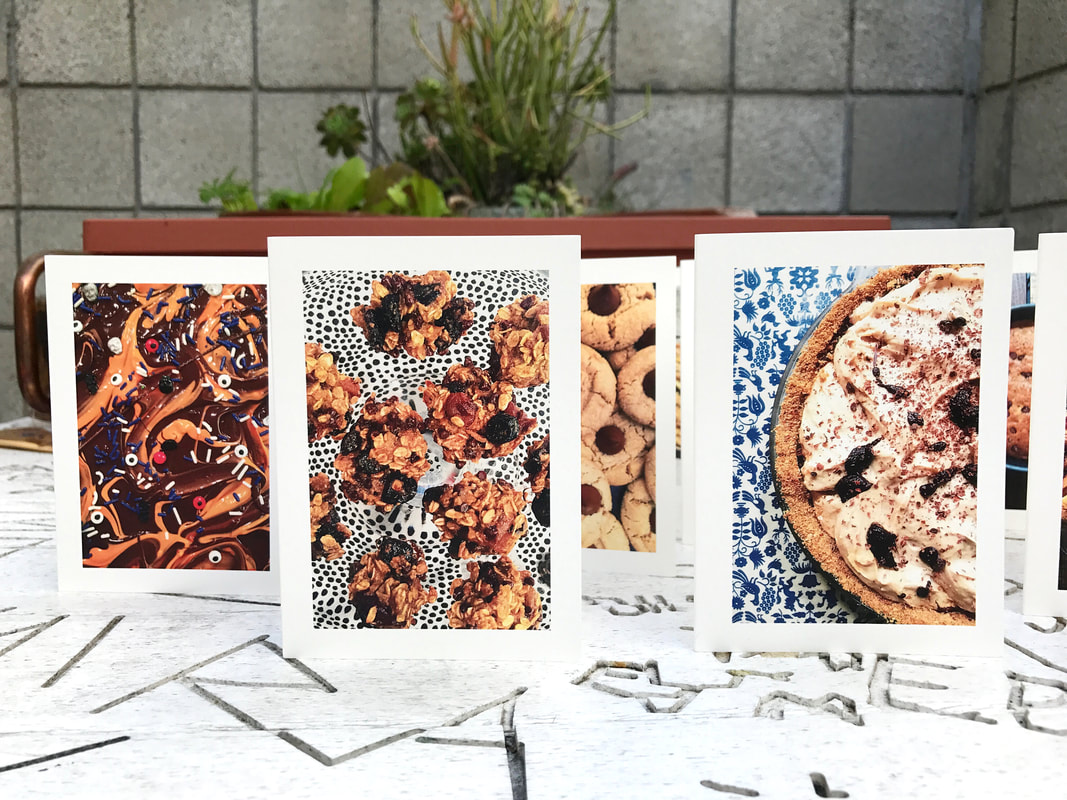
www.lemonthymeandginger.com www.amandaskrip.com www.floursinyourhair.com www.pricklyfresh.com www.mindyscookingobsession.com www.cocoaandsalt.com www.thegoodcooker.com www.farmandcoastcookery.com @glutenfrites www.sproutingradiance.com www.smartinthekitchen.com www.cooksandkid.com @my.recipe.addiction @thewholeelchilada www.gobblethecook.com www.weelicious.com www.feedtheswimmers.com www.thegingeredwhisk.com www.itsavegworldafterall.com www.blossomtostem.net www.holajalapeno.com www.somethingnewfordinner.com www.foodfash.com @juangmaggie www.allomamanwhatscooking.com www.alwayseatdessert.com @whatskarencooking www.myafternoonkitchen.com @anna.culina @myloveatfirstbite www.especiallysoutherndishes.com @fabi_recipes www.easyanddelish.com @easygourmetliving @dreamingitalian @forktosummit www.playzwithfood.com @lazy_tyko @m.pontikis www.hatibon.comwww.carlydiaz.com www.flottelotte.eu @motherfoodie www.piegirlbakes.com @thegalettegirl @khabakom www.teebsie.com @ariaadjani www.wellnesswithalyssa.com @hunneedee www.measuringcupsoptional.com www.jessiesheehanbakes.com www.weeknightbite.com www.confettikitchen.com www.ful-filled.com www.lindarcampos.com @jewhungry @candacenelson www.thewoodandspoon.com Also be sure to check out our wonderful photo cards on our ETSY site! These are all cards made from our photos of all the food we make, including pie! Supplies are running out:) Summer fruit, or really any season's fruit lend themselves to rustic tarts, or galettes. Once you get the basics down, they are an easy, adaptable, and delicious dessert that you can throw together for a party or just for a sweet weeknight treat. Yes, you do have to learn how to make dough, but our recipe is tried and true, and you can make it in the food processor. We always make a full batch of dough as we love having one dough at hand in the freezer. One batch makes two tarts! The dough can be jazzed up with whatever spices you like, this one has some ginger and vanilla in it, but cardamon, cinnamon and nutmeg are all tasty additions. You can also go savory with basil, oregano, or even sesame seeds and fill with veggies. We will post a recipe for a savory galette soon! It may look hard, but we promise, try it and once you make one you won't be able to stop! Mixed Fruit Galette Makes one Galette that serves about 8 ½ Batch of your favorite pie dough or store bought, enough for 1 disc 2-3 cups mixed fruit, cut into bit sized pieces (this has apricots, blueberries and strawberries) 1 lemon, juiced and zested ¼ c to 1/3 c sugar depending on the sweetness of your fruit 1/4 cup cornstarch ½ teaspoon ginger, nutmeg, or cinnamon ½ teaspoon vanilla extract 1 egg, beaten Sugar for sprinkling Preheat oven to 375 Add cornstarch, lemon juice, vanilla extract, lemon zest, sugar, and spice to a bowl. Mix then add the fruit. Carefully mix fruit, but mix well so juices begin being released. Mix until cornstarch is almost dissolved then set aside. Roll out your dough on a well-floured surface. Trim sides to get as close to a circle as you can then save the scraps. Move dough onto a parchment lined baking tray preferably without a lip. Place fruit in middle of the dough and spread out, leaving about a two-inch rim around the sides. Brush with egg wash and start at twelve o’clock, folding the dough in. Work your way around the tart and use the egg wash to seal your folds. You will get about 6-8 folds resembling an octagon or hexagon. You can stop here and brush with egg wash, then sprinkle with sugar. Or, reroll scraps and have some fun with cookie cutters, using the egg wash to help stick your shapes to the tart. When done decorating, brush with egg wash and sprinkle with sugar. Bake for 40-50 minutes until fruit is bubbling and dough is brown. If it browns too quickly cover with foil and keep baking. *You can also freeze before baking and then bake when you choose. It will take about 20 more minutes. We have a thing for pie and especially apple pie. This is a riff on Grandma Ceil's award winning apple pie. She didn't do the caramel part, but her pies were always on point. Apples are pretty much always in season somewhere so play around with the different varieties you find. By creating a caramel first, the flavors of the apples and the honey really shine. And, yes, we also have a thing for #pieart. Grab your favorite cookie cutters or practice the braids you did as a child and have FUN! Caramel Apple Pie 1 9 “ pie 1 batch of your favorite pie dough or store bought, you need 2 discs 6 large apples, peeled, cored and sliced Juice of ½ lemon 2 tablespoons flour 2 tablespoons tapioca flour ½ tsp. cinnamon ½ cup butter ¼ cup white honey ½ cup brown sugar Pinch of salt 1 egg whisked Sugar for sprinkling Preheat oven 425 Place apples in a large bowl and toss with lemon juice, flour, and cinnamon. Set aside. In a sauté pan on medium high heat add butter, honey, and brown sugar with a pinch of salt. Swirl pan carefully to mix and let mixture get bubbly. Watch carefully and keep swirling or stirring until the caramel thicken slightly and begins to brown. Add in apples and stir to coat for one minute. Remove from heat and set aside. Remove dough from refrigerator and let warm up for ten minutes. Roll one disc out until about 1/8 inch thick and line pie dish. Leaving over hanging dough. Fill with apples and then roll our second disc. Cover apples with dough and crimp the edges together either with a fork or rolling and using your fingertips to pinch along the edges. With a sharp knife make some small slits on the top to let steam out. You can make little trees or arrows. You can also create a lattice with strips and braids or play with cookie cutters. You just want to leave some negative space so steam can escape. Brush with the whisked egg and sprinkle with sugar. Place in oven and after 10 minutes drop heat to 350 and cook for another 40 minutes or until apples are soft when tested with a knife or tooth pick. If the pie is browning to quickly cover the tip with tinfoil. Let rest before cutting. Serve with ice cream or whipped cream
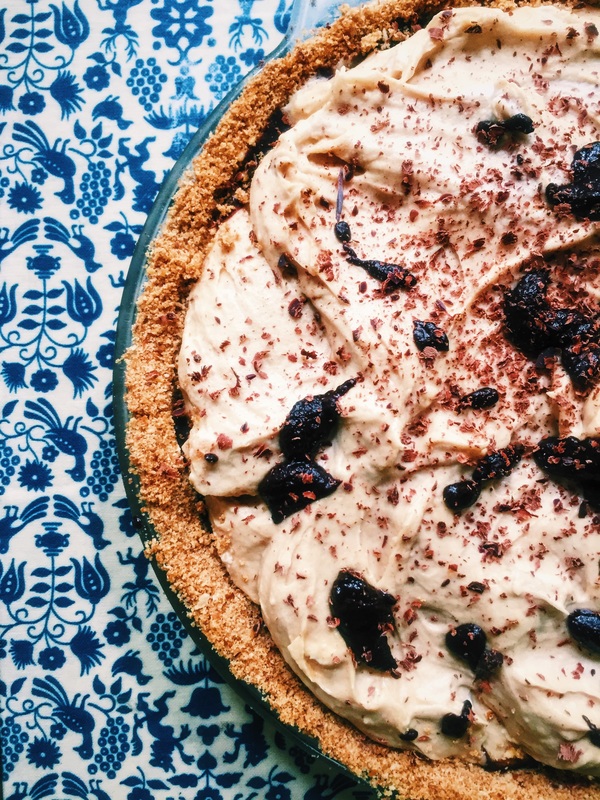
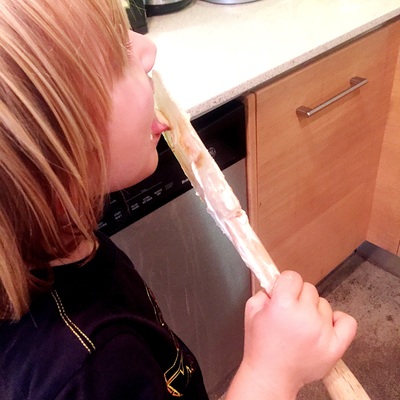
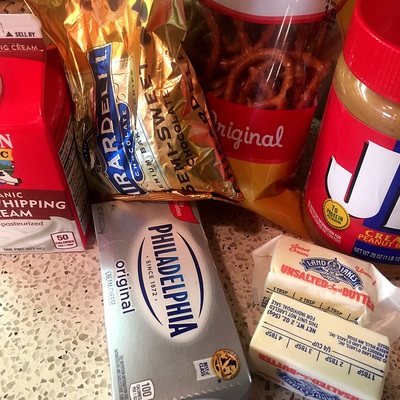
For the month of October, we are donating a portion of the sales of our greeting and note cards to help those in Puerto Rico. Be sure to check out our Etsy site! Peanut butter and chocolate are a classic and favorite combination. As are pretzels and peanut butter. This pie combines everything that is wonderful into one delicious bite. The littlest one loves using the food processor, so he got in on the crust making action. However, once the peanut butter and cream cheese and whipped cream started coming together, he ran off with the spoon to lick away in peace! Peanut Butter and Chocolate Pie with Pretzel Crust Makes one pie ½ cup-3/4 cup crushed pretzels. (About large 4 handfuls of whole pretzels) 6 tablespoons butter, melted plus 1 tablespoon ½ cup brown sugar 8 oz. cream cheese 1-cup smooth peanut butter ½ cup powdered sugar 1 tsp. vanilla extract 2 cups heavy cream plus 2 tablespoons ½ cup semi sweet chocolate chips Preheat oven to 375 Place crushed pretzels, melted butter, and brown sugar in food processor and pulse until mixture begins to clump together. Dump into pie dish and press/pat firmly on bottom and sides to make crust. You want it to be even, about ¼ of an inch thick. Place in oven and bake 10-15 minutes until the crust turns a light golden brown. Remove and cool. Whip the 2 cups of heavy cream, and once soft peaks appear, add the vanilla extract. Beat a minute or two more until firm peaks. With a handheld mixer or stand mixer, beat cream cheese, peanut butter and powdered sugar together until incorporated. With a spatula carefully fold half the whipped cream into the peanut butter mixture. Once mixed, fold in remaining whipped cream until mixture is uniform. Set Aside. In a microwave safe dish add chips, 2 tablespoons of cream and the butter. Depending on your microwave, heat until chips melt, then stir carefully until mixed. Pour into prepared pretzel shell and place in freezer to cool for 10 minutes. Remove crust from freezer and fill with Peanut Butter mousse. Chill for at least two hours or over night. Fifteen minutes before serving, remove pie and decorate with shaved chocolate, or chopped peanuts, or chopped peanut butter cups. |
A square meal is satisfying, nourishing, complete.
A round table includes all. Categories
All
|
Proudly powered by Weebly
 RSS Feed